Homemade Snowflake Christmas Cards

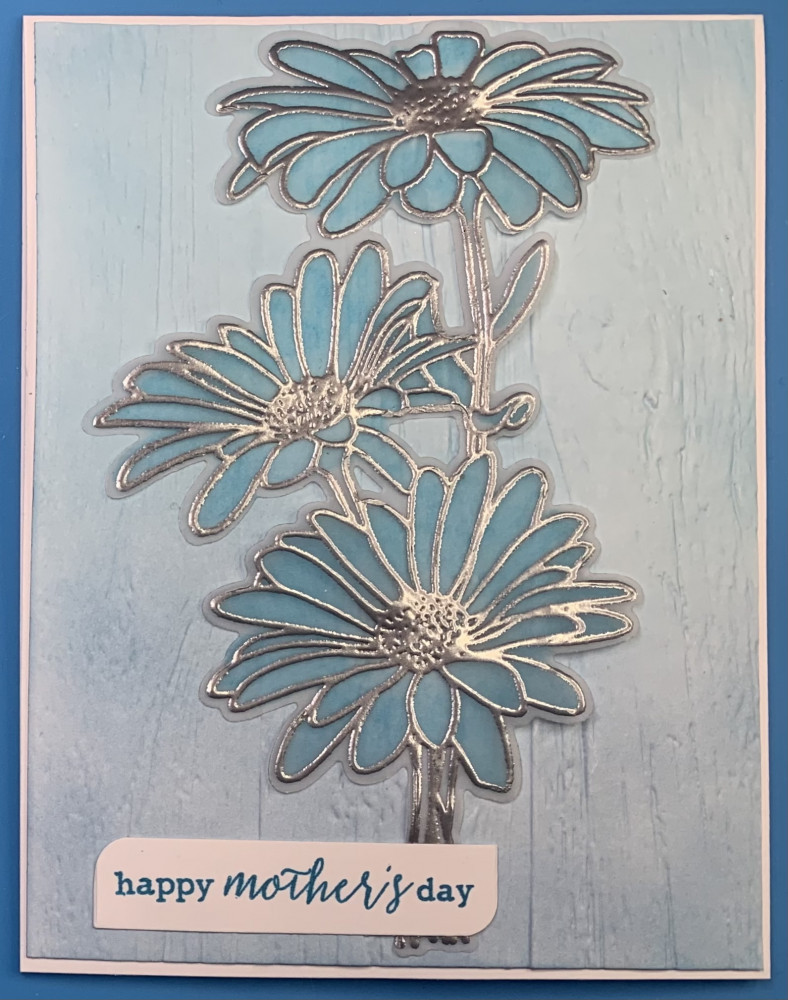
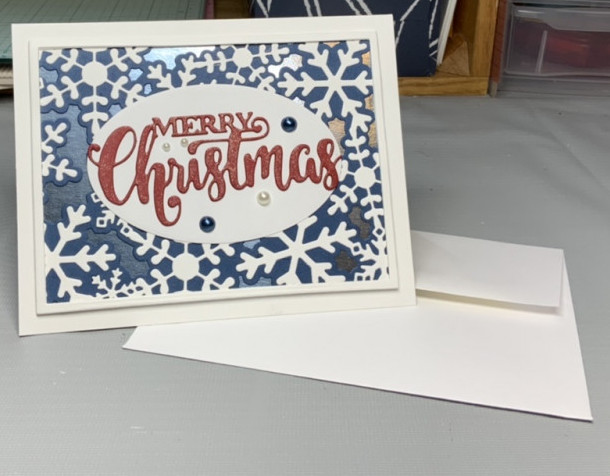
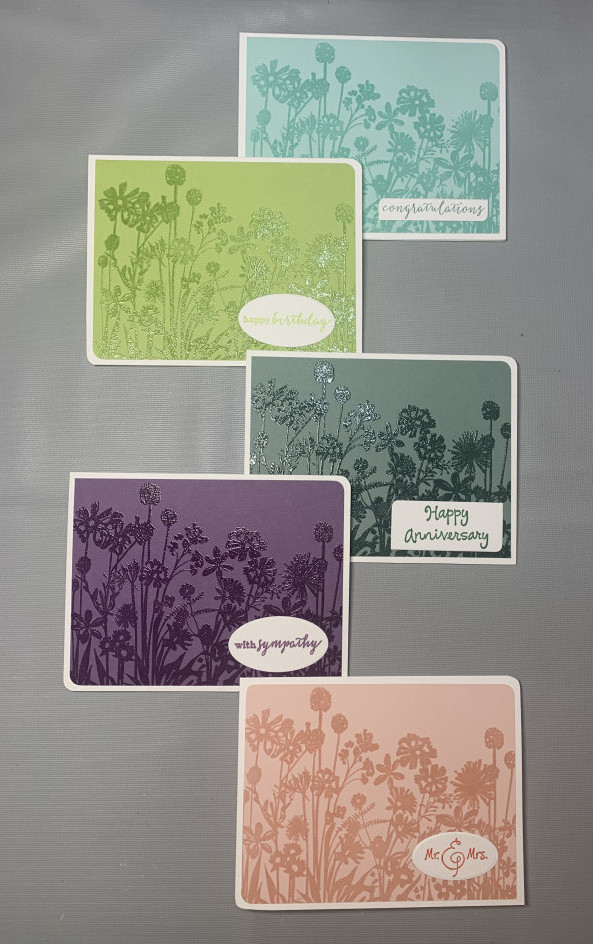
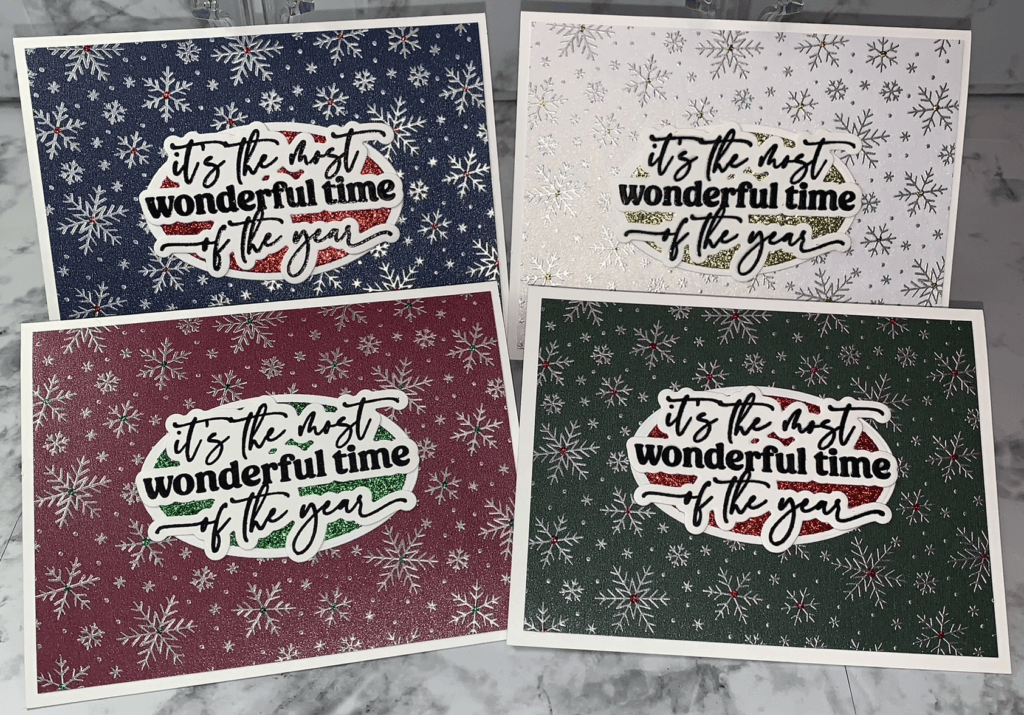
Hello everyone! Today I’ll be making a set of Homemade Snowflake Christmas Cards. The finished set is shown below.

Finished set of 4 Homemade Snowflake Greeting Cards

If you’d like to learn how to make these, keep on reading to find out!


Getting Started

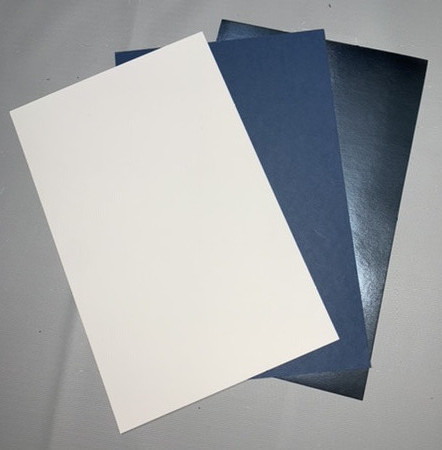
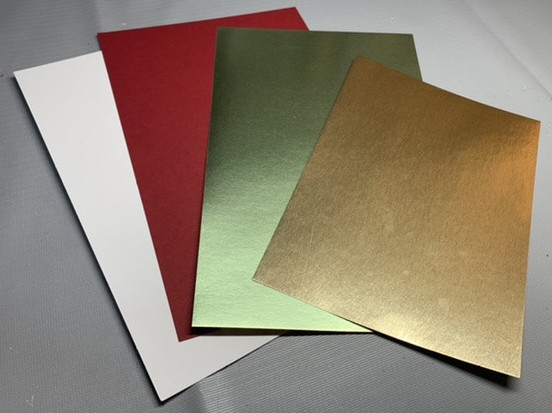
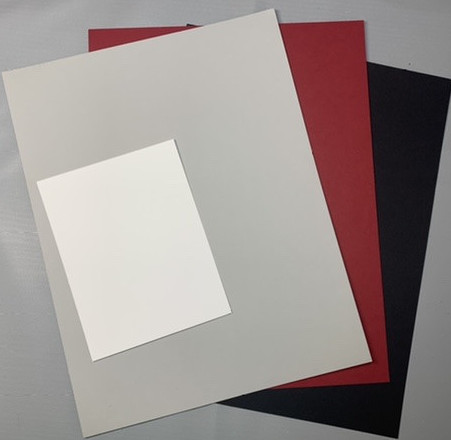
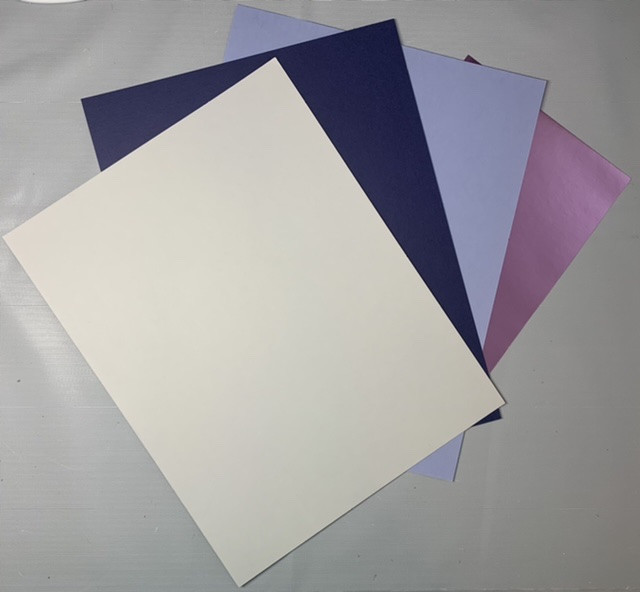
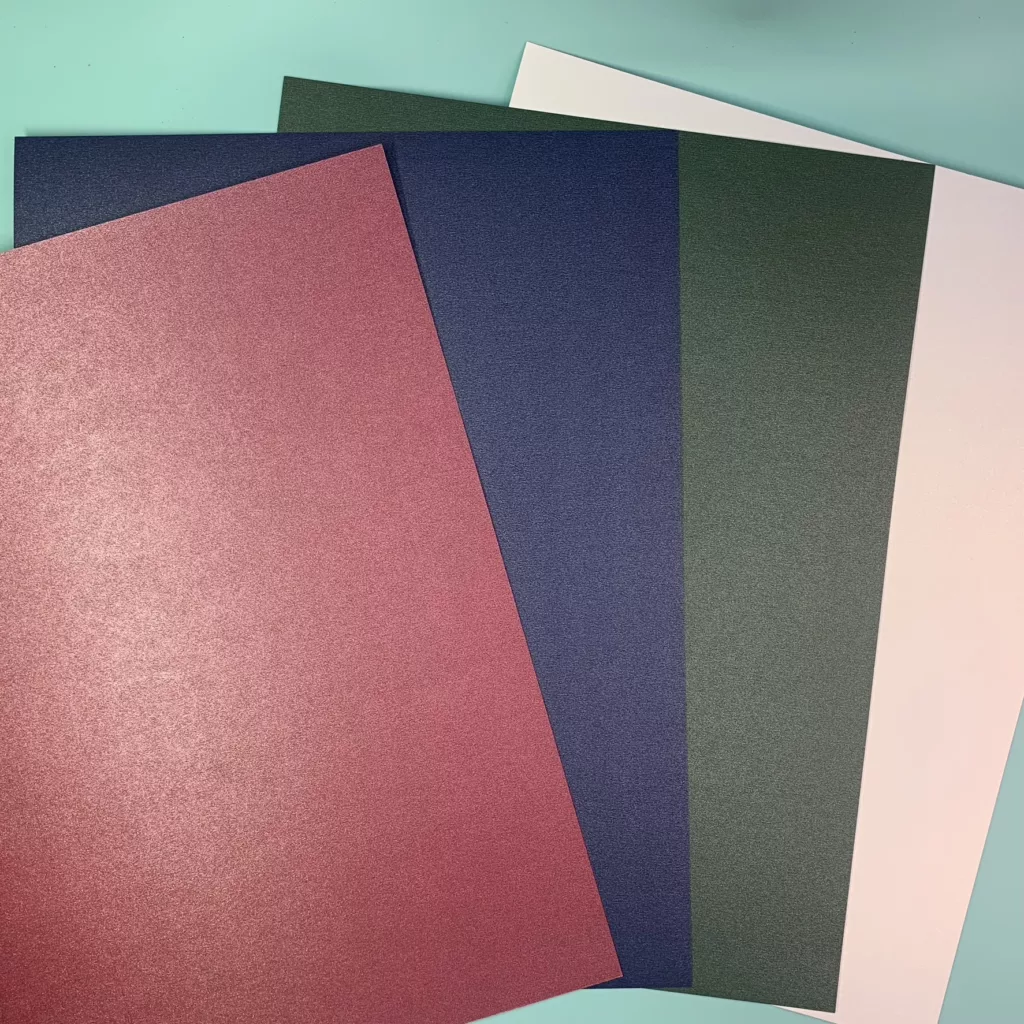
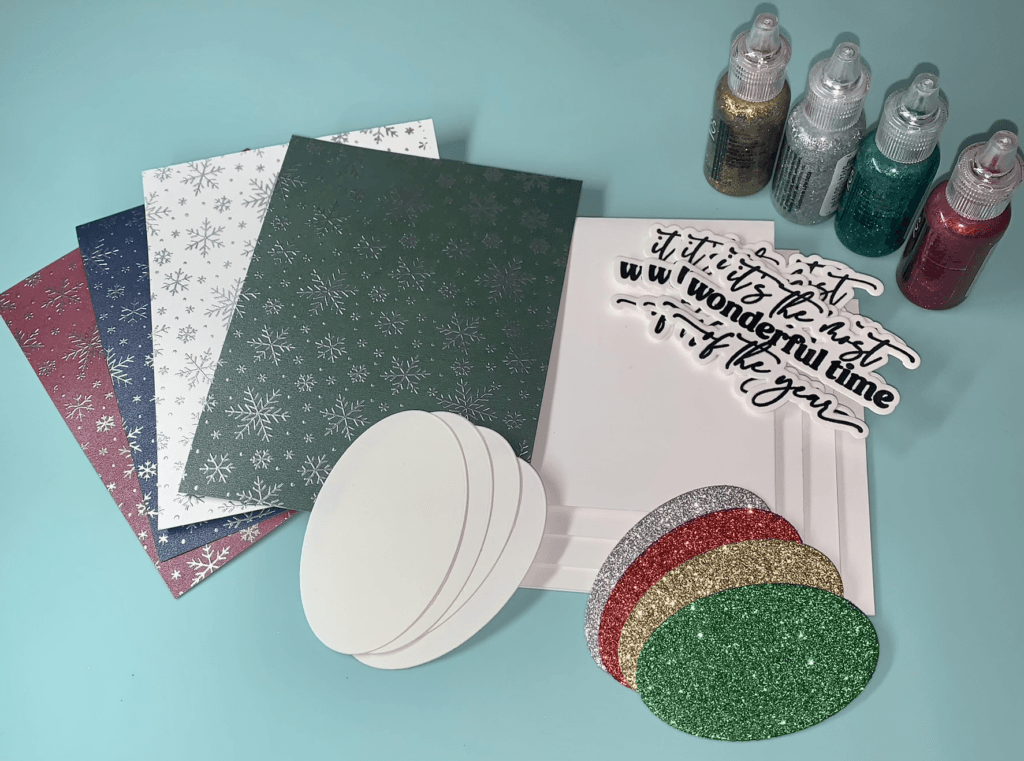
The first thing I’ll do is to get out the cardstock that I’ll be using to make the cards (I will list all of the supplies I used to make these cards at the end of this post). I wanted to maximize the amount of sparkle on these cards, so I chose a pearlized cardstock that has the most beautiful shimmer on it. I picked four Christmas-type colors from the cardstock set that had many other colors in it as well. Below is a picture of the colors that I chose.

Red, Blue, Green and White Pearlescent Cardstock

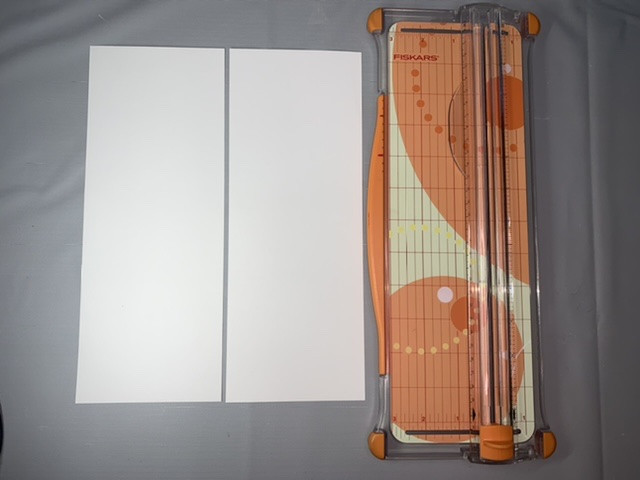
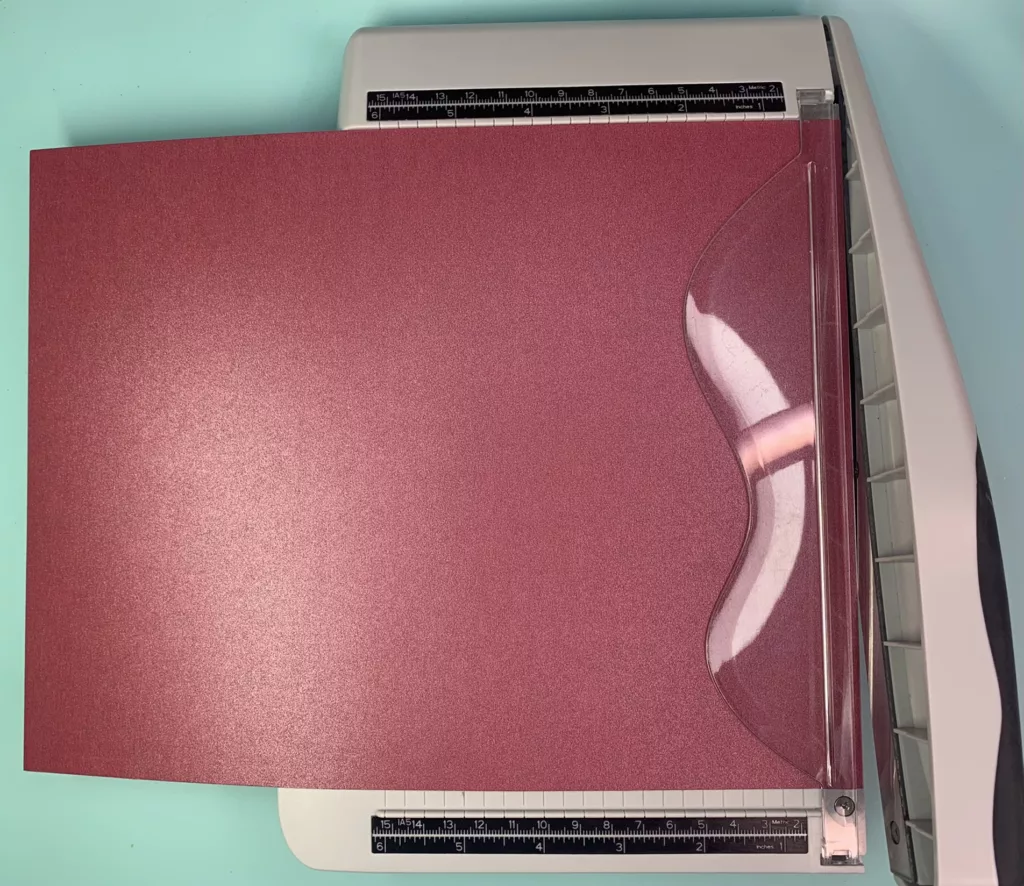
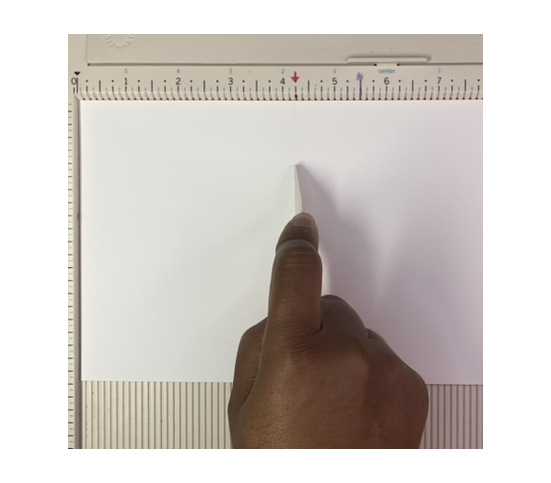
I decided to use the red cardstock to show you the process of how I made the cards, then I’ll repeat that process with the other three colors. I cut my 8.5″x11″ red cardstock into 4 pieces that are all 4.25″ x 5.5.” Below is a picture of the red cardstock before cutting it into 4 pieces.

Homemade Snowflake Greeting Cards

I’m almost ready to stamp the snowflake image onto the cardstock. Before doing that, I dab my anti-static bag onto the cardstock several times. I usually do it until I see some dust sitting on the cardstock. Don’t worry about the dust on the card, it won’t interfere with you getting a clear stamped image. It actually will help you to get a good result by eliminating any static electricity on your cardstock.

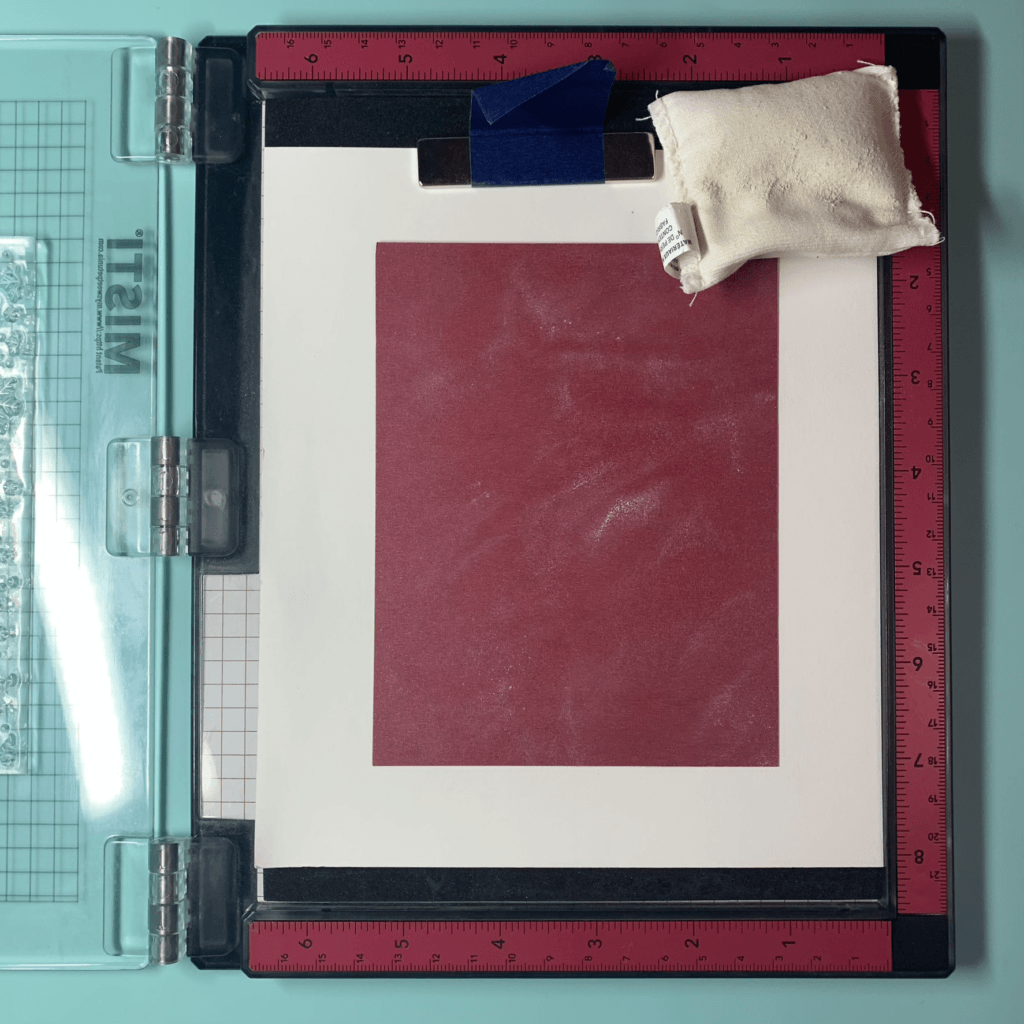
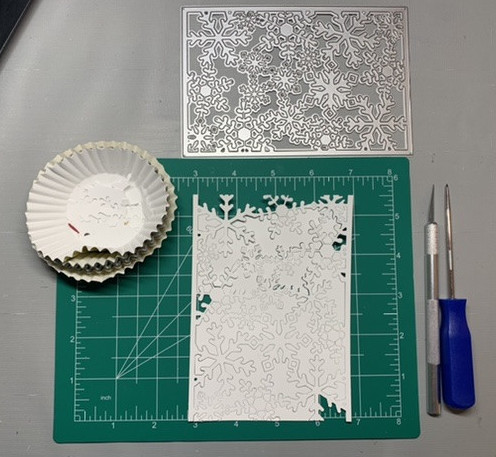
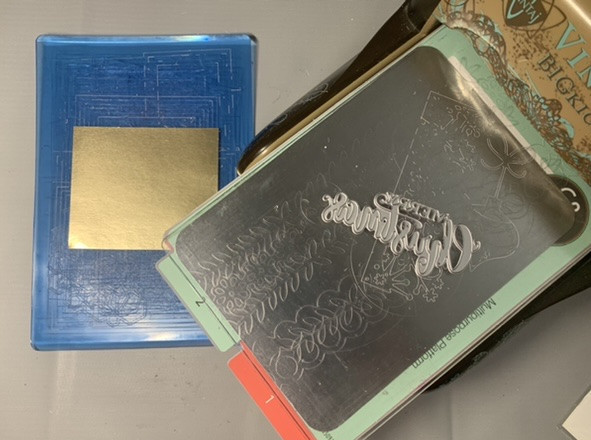
The next thing to do is to stamp the background image using a background snowflake stamp. To do this, I place the cardstock onto my stamping platform. In order to get the stamp placed exactly where I want it, I placed the stamp (without any ink) face down onto the cardstock, making sure that all sides of the stamp reach past each side of the cardstock.

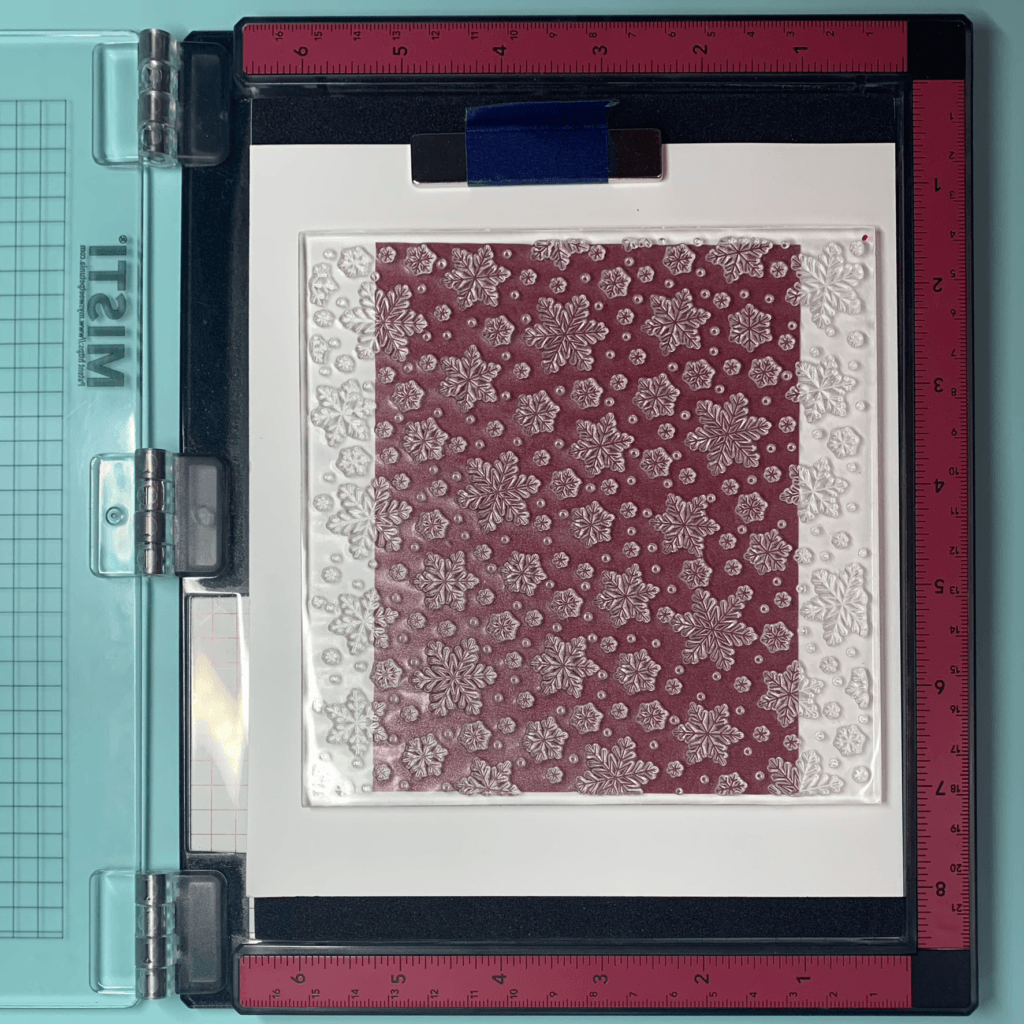
Then I close the top, clear piece of the platform onto the backside of the stamp that is still laying face down on the cardstock. Once I’ve done this, I push down with my stamp pressure tool (or you can use the palm of your hand) and move it around the entire area of the stamp. Doing this makes the stamp cling evenly to the top piece of the platform. This process is shown in the pictures below.

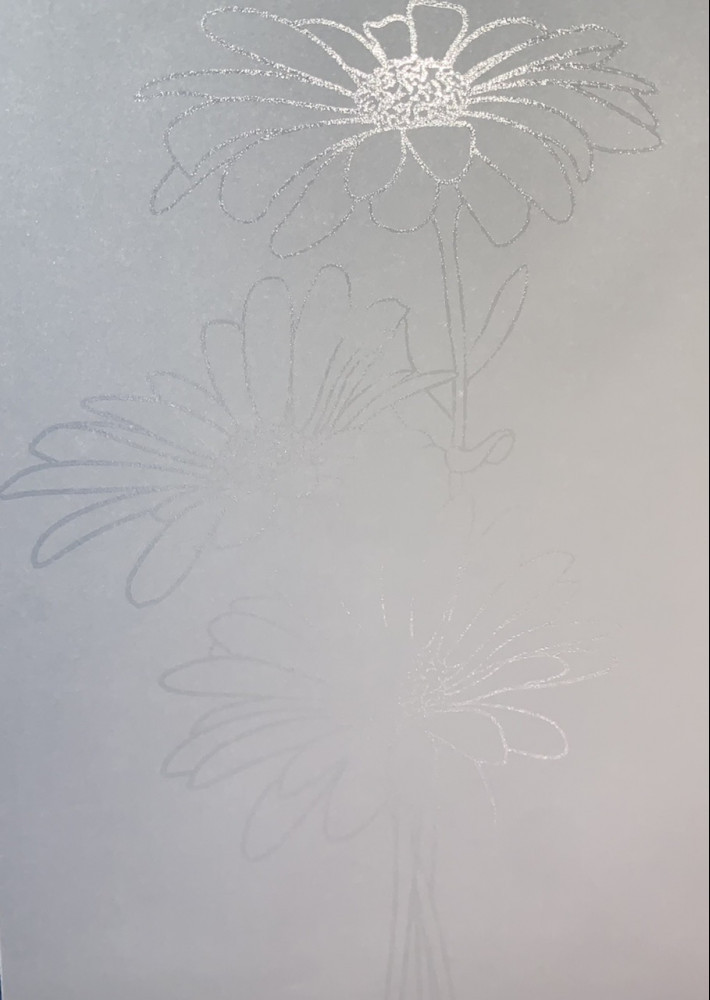
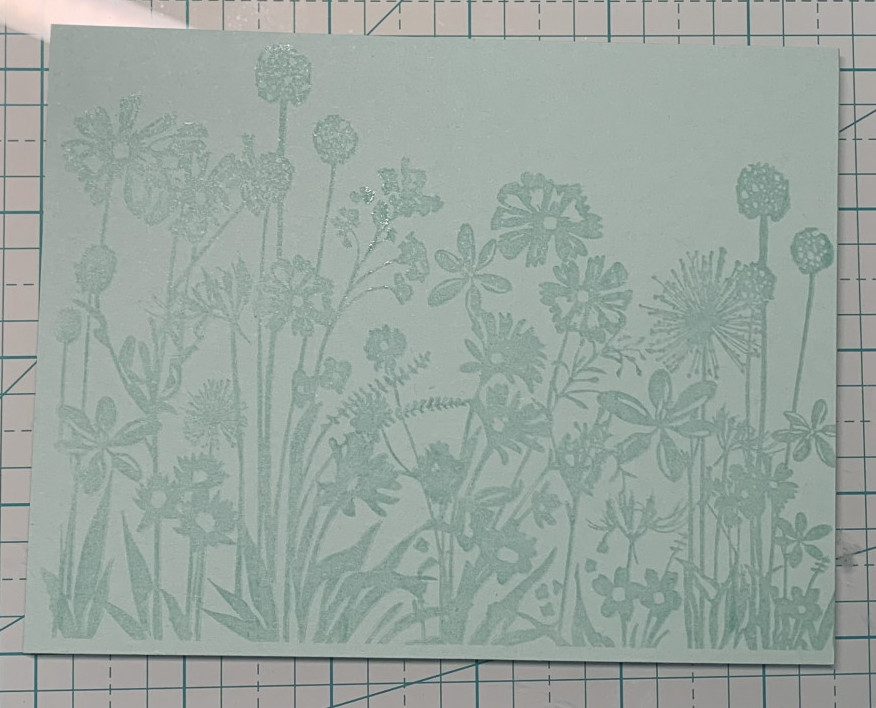
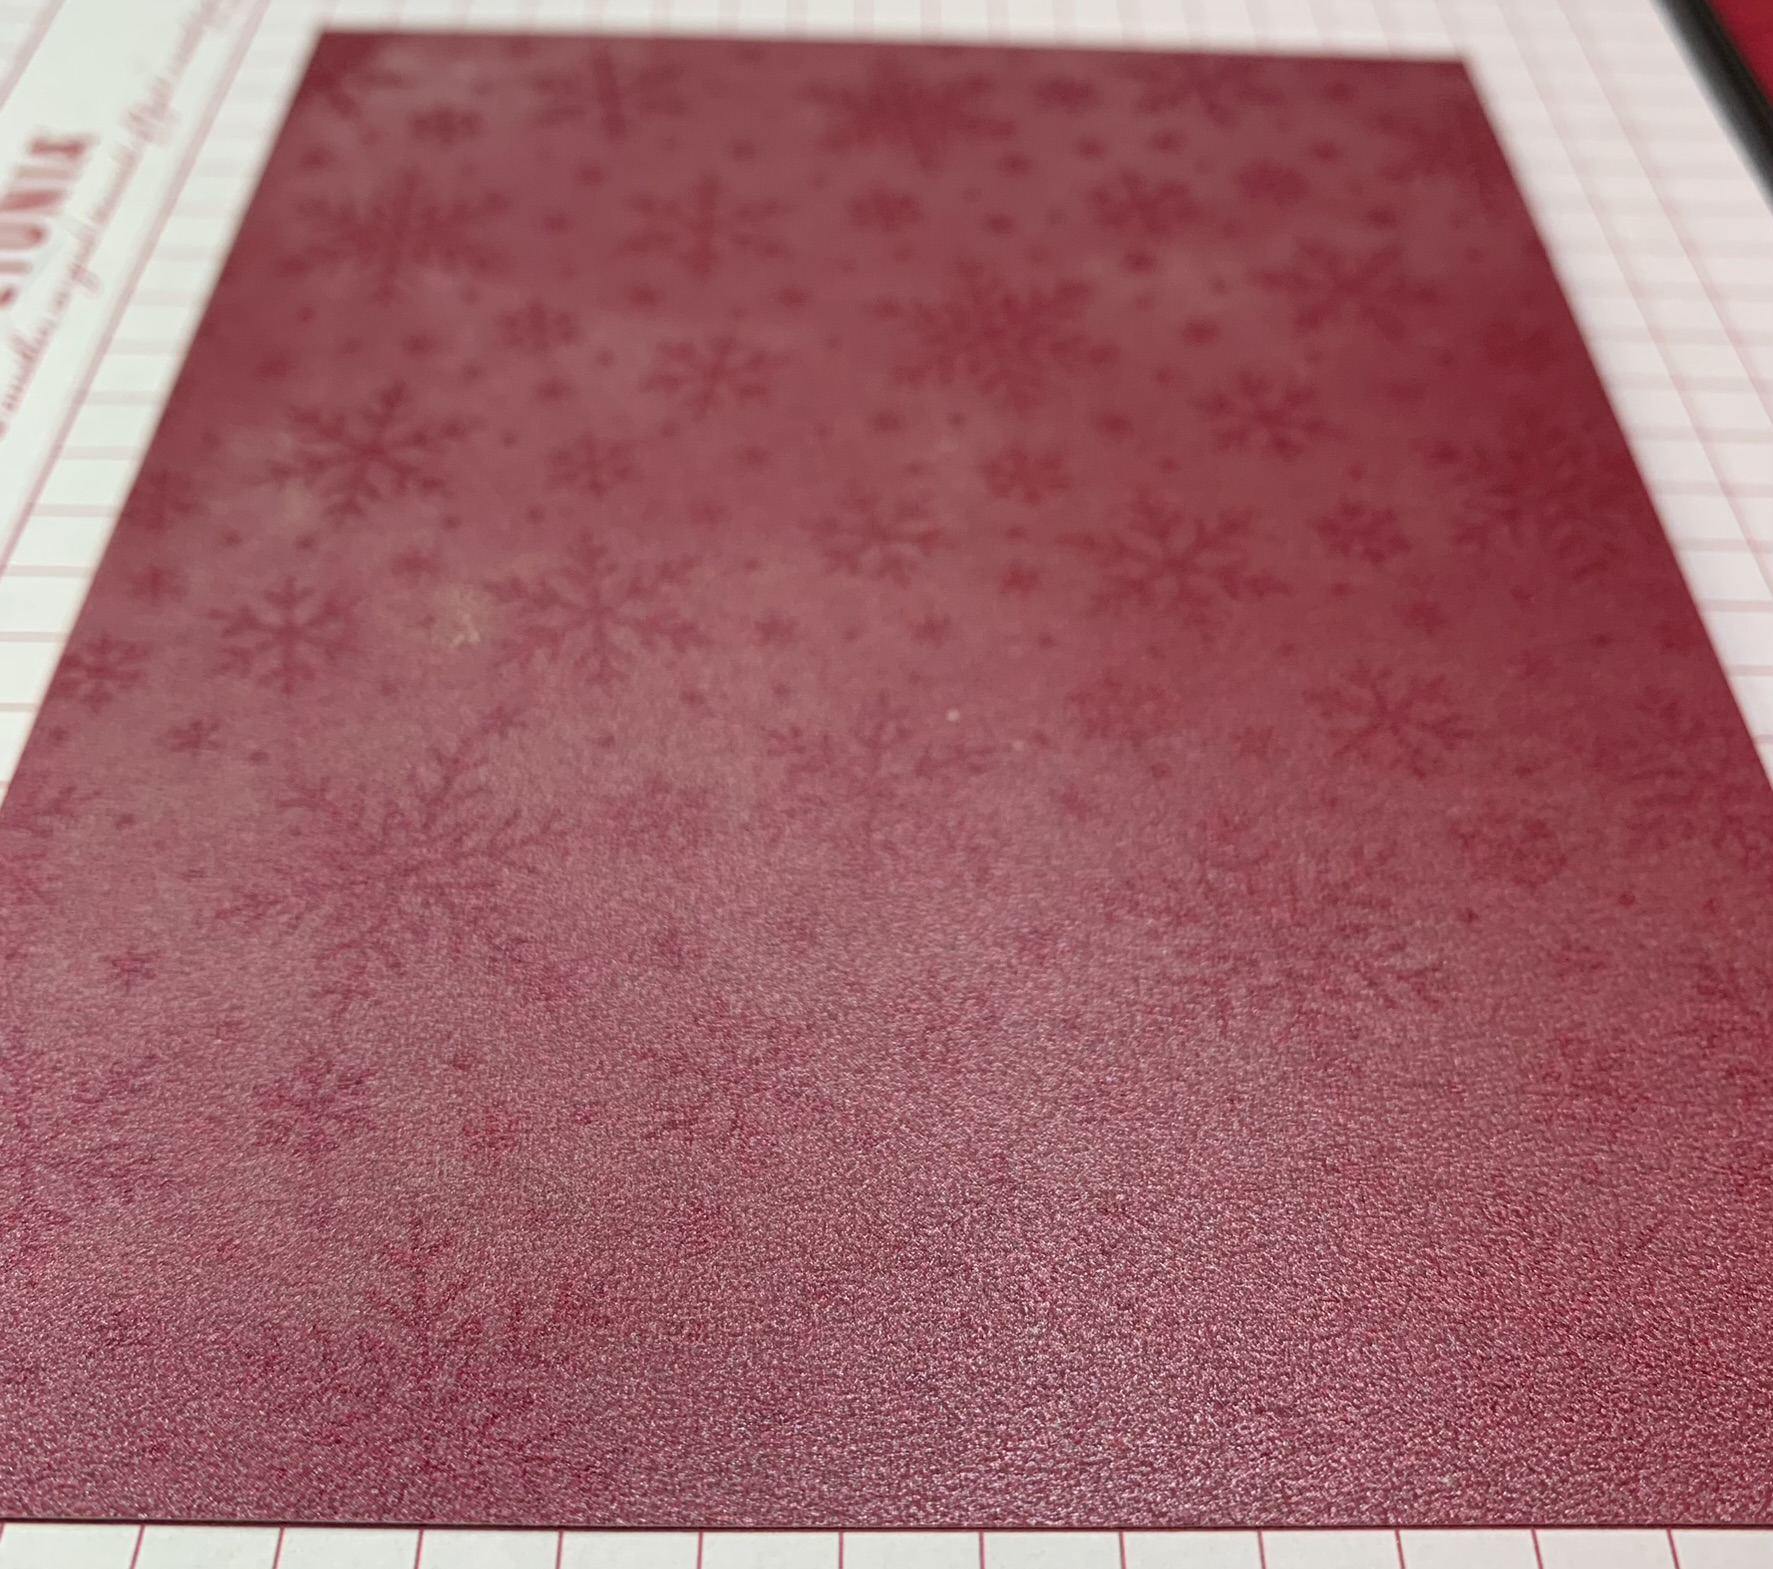
Now it’s finally time to stamp the snowflake image onto the cardstock. I used a clear watermark/embossing ink to do this. I usually ink then stamp two times, which allows a lot of the ink to get transferred to the cardstock. The result may be hard to see if the light isn’t hitting the paper at a certain angle, but don’t worry. The image will show up in a big way soon. Below is a picture of the cardstock after being stamped twice.

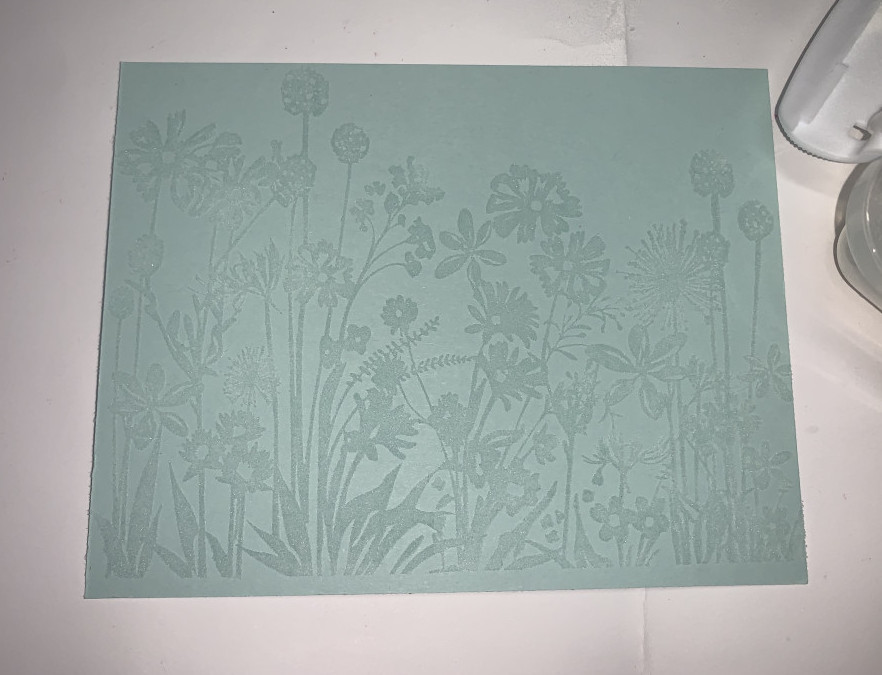
Once the image has been stamped, it’s time to cover it with silver embossing powder. I use a flattened out coffee filter to catch the embossing powder that falls off of the cardstock. This makes putting the embossing powder back into its container a bit easier. Below is a picture of the cardstock with embossing powder on part of the image so that you can see the difference.

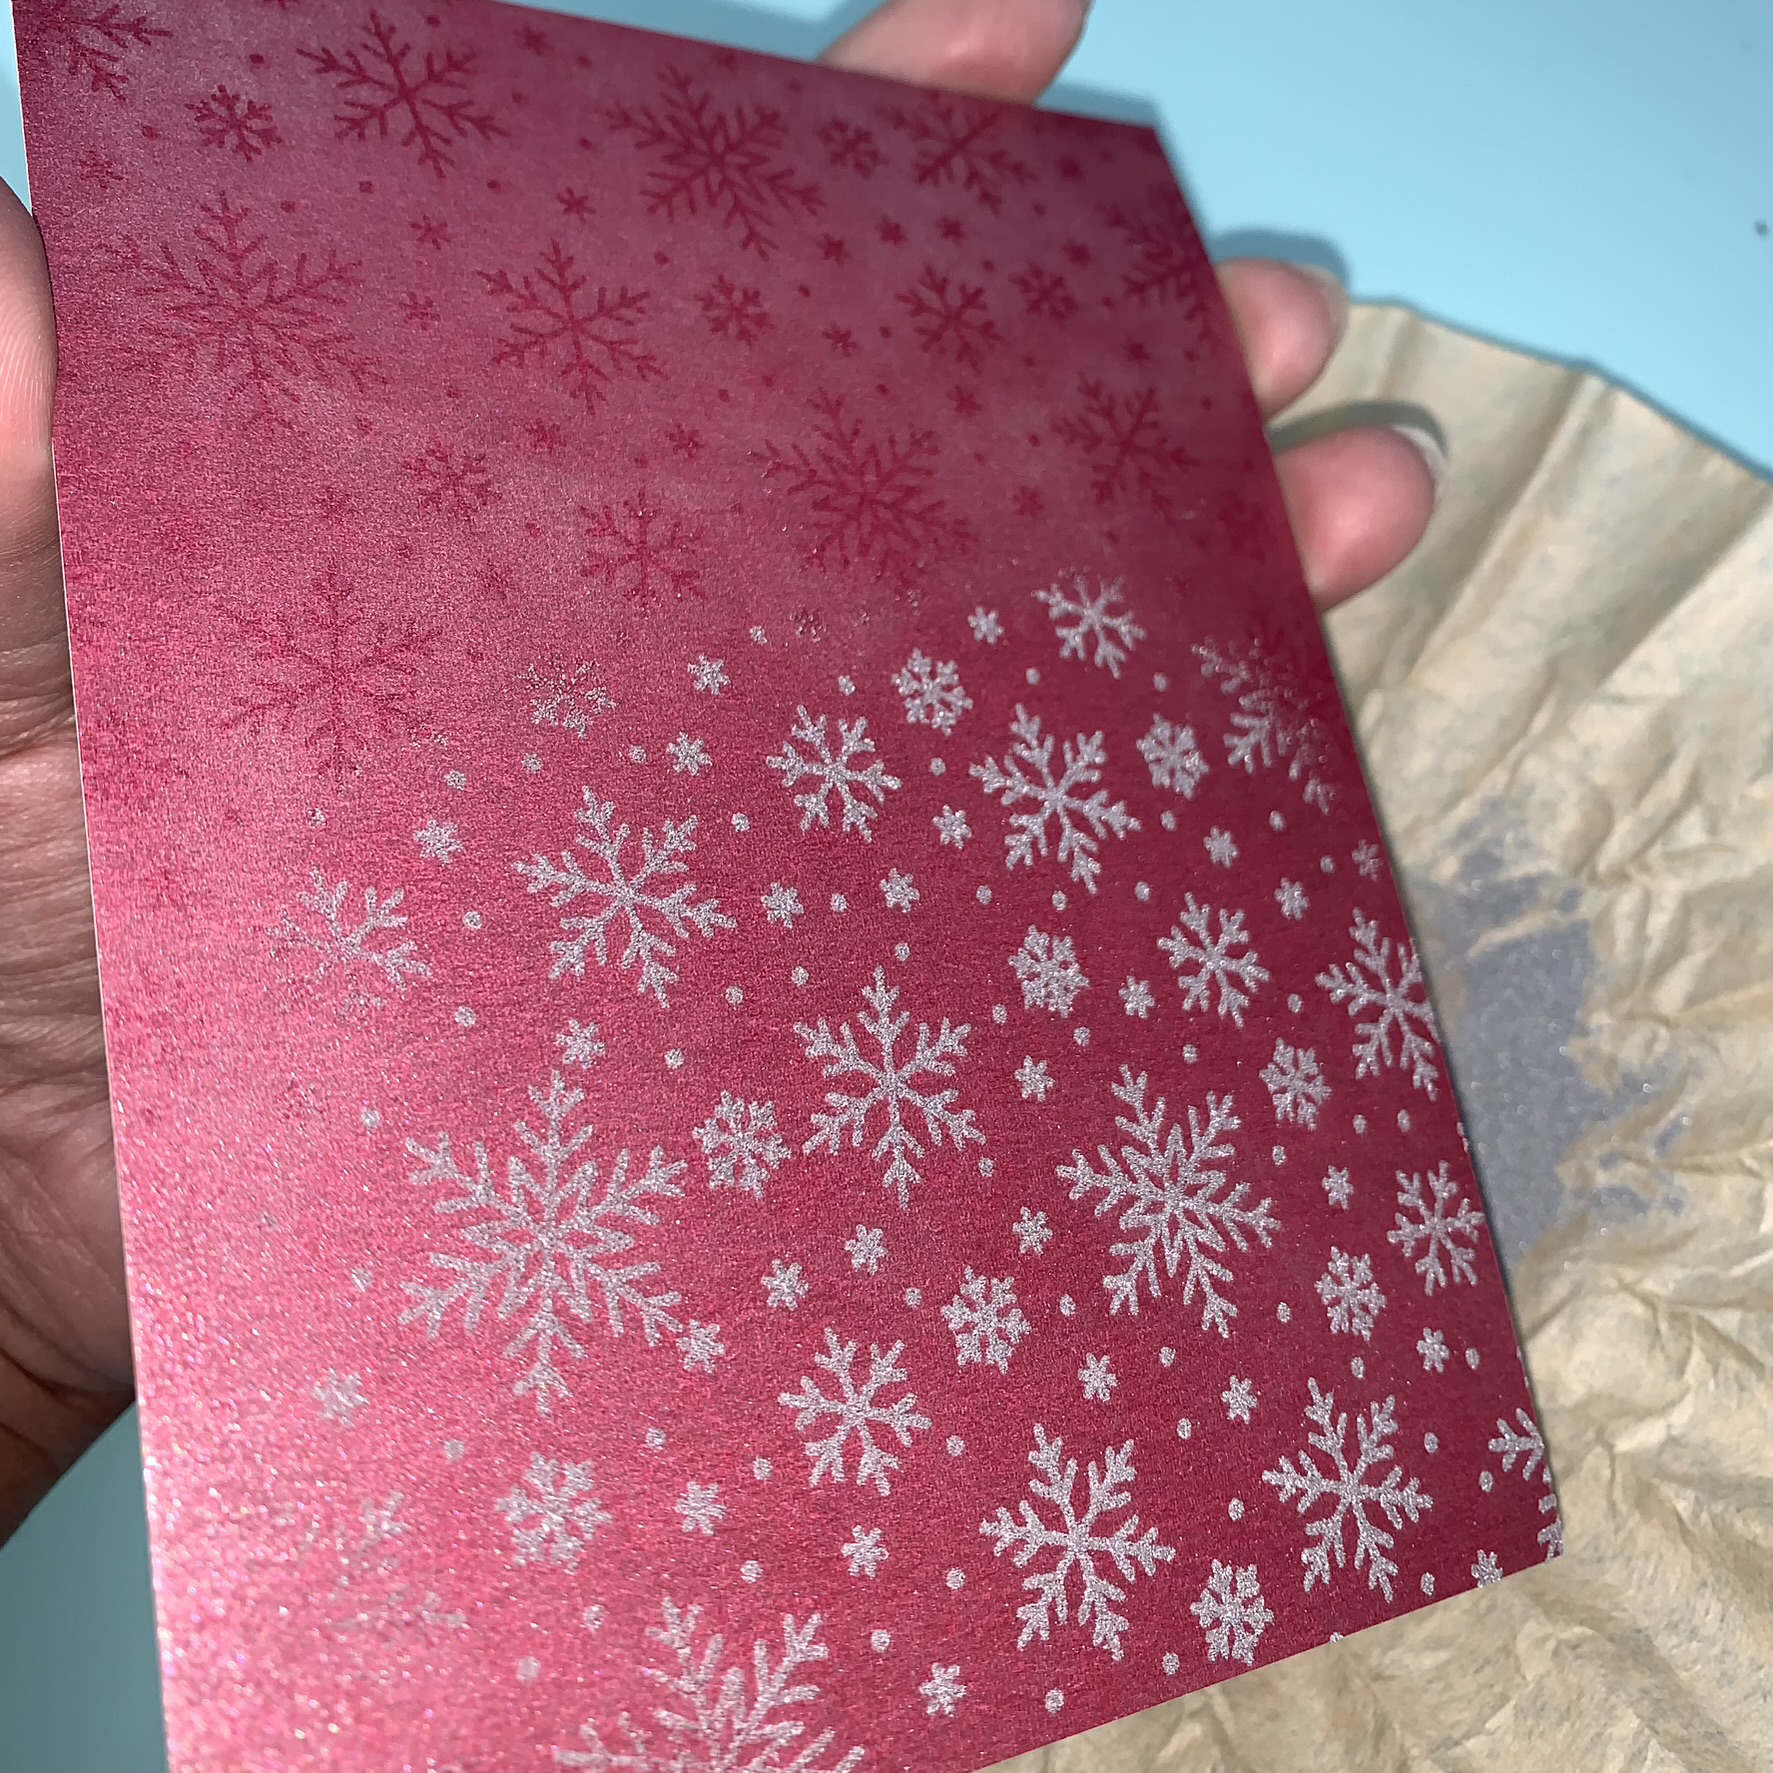
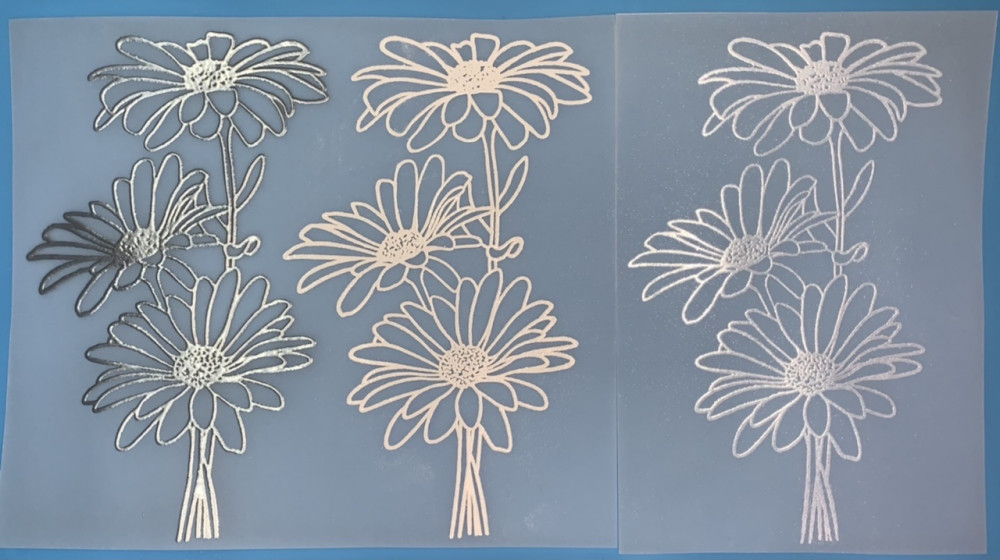
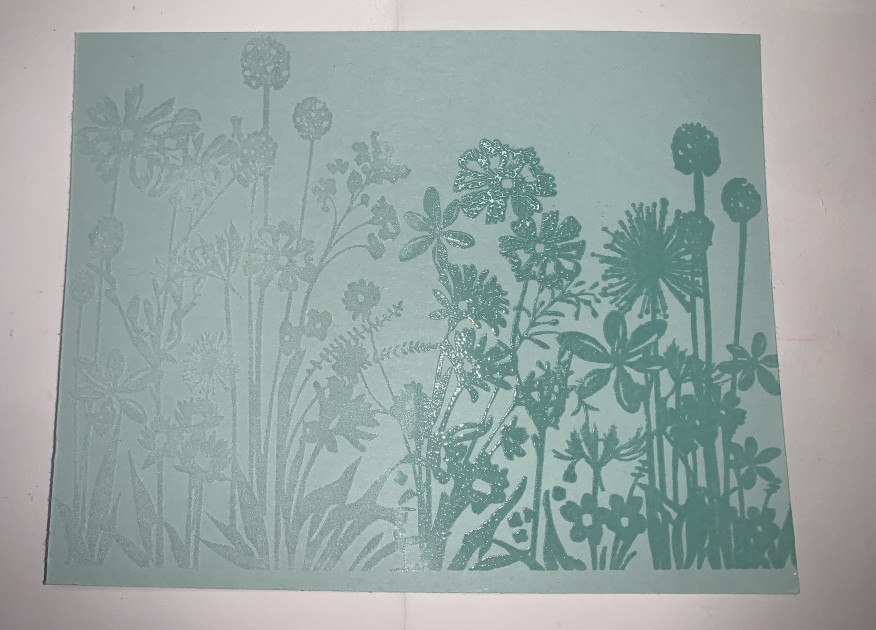
Once all of the embossing powder is on the cardstock, it’s time to heat it so that it melts. This will make the stamped image raised, smooth, shiny and permanent. This process is called heat embossing. This particular cardstock burns/discolors much faster than regular cardstock, so I recommend turning on your heat gun and letting it stay on (make sure the heat gun isn’t pointed at anything that could melt/burn) for 30-60 seconds before bringing it closer to the cardstock. When you do begin to bring it closer to the cardstock, make sure you move the heat gun all around the cardstock constantly. Make sure to have at least 1-2 inches between the heat gun and the cardstock. Start further away and keep moving the heat gun until you see the texture and color of the stamped image change. It will be easy to see the change with silver embossing powder. Also make sure to take care of your fingers because the heat gun gets REALLY hot!! The picture below shows half of the cardstock before heat embossing and half after heat embossing.

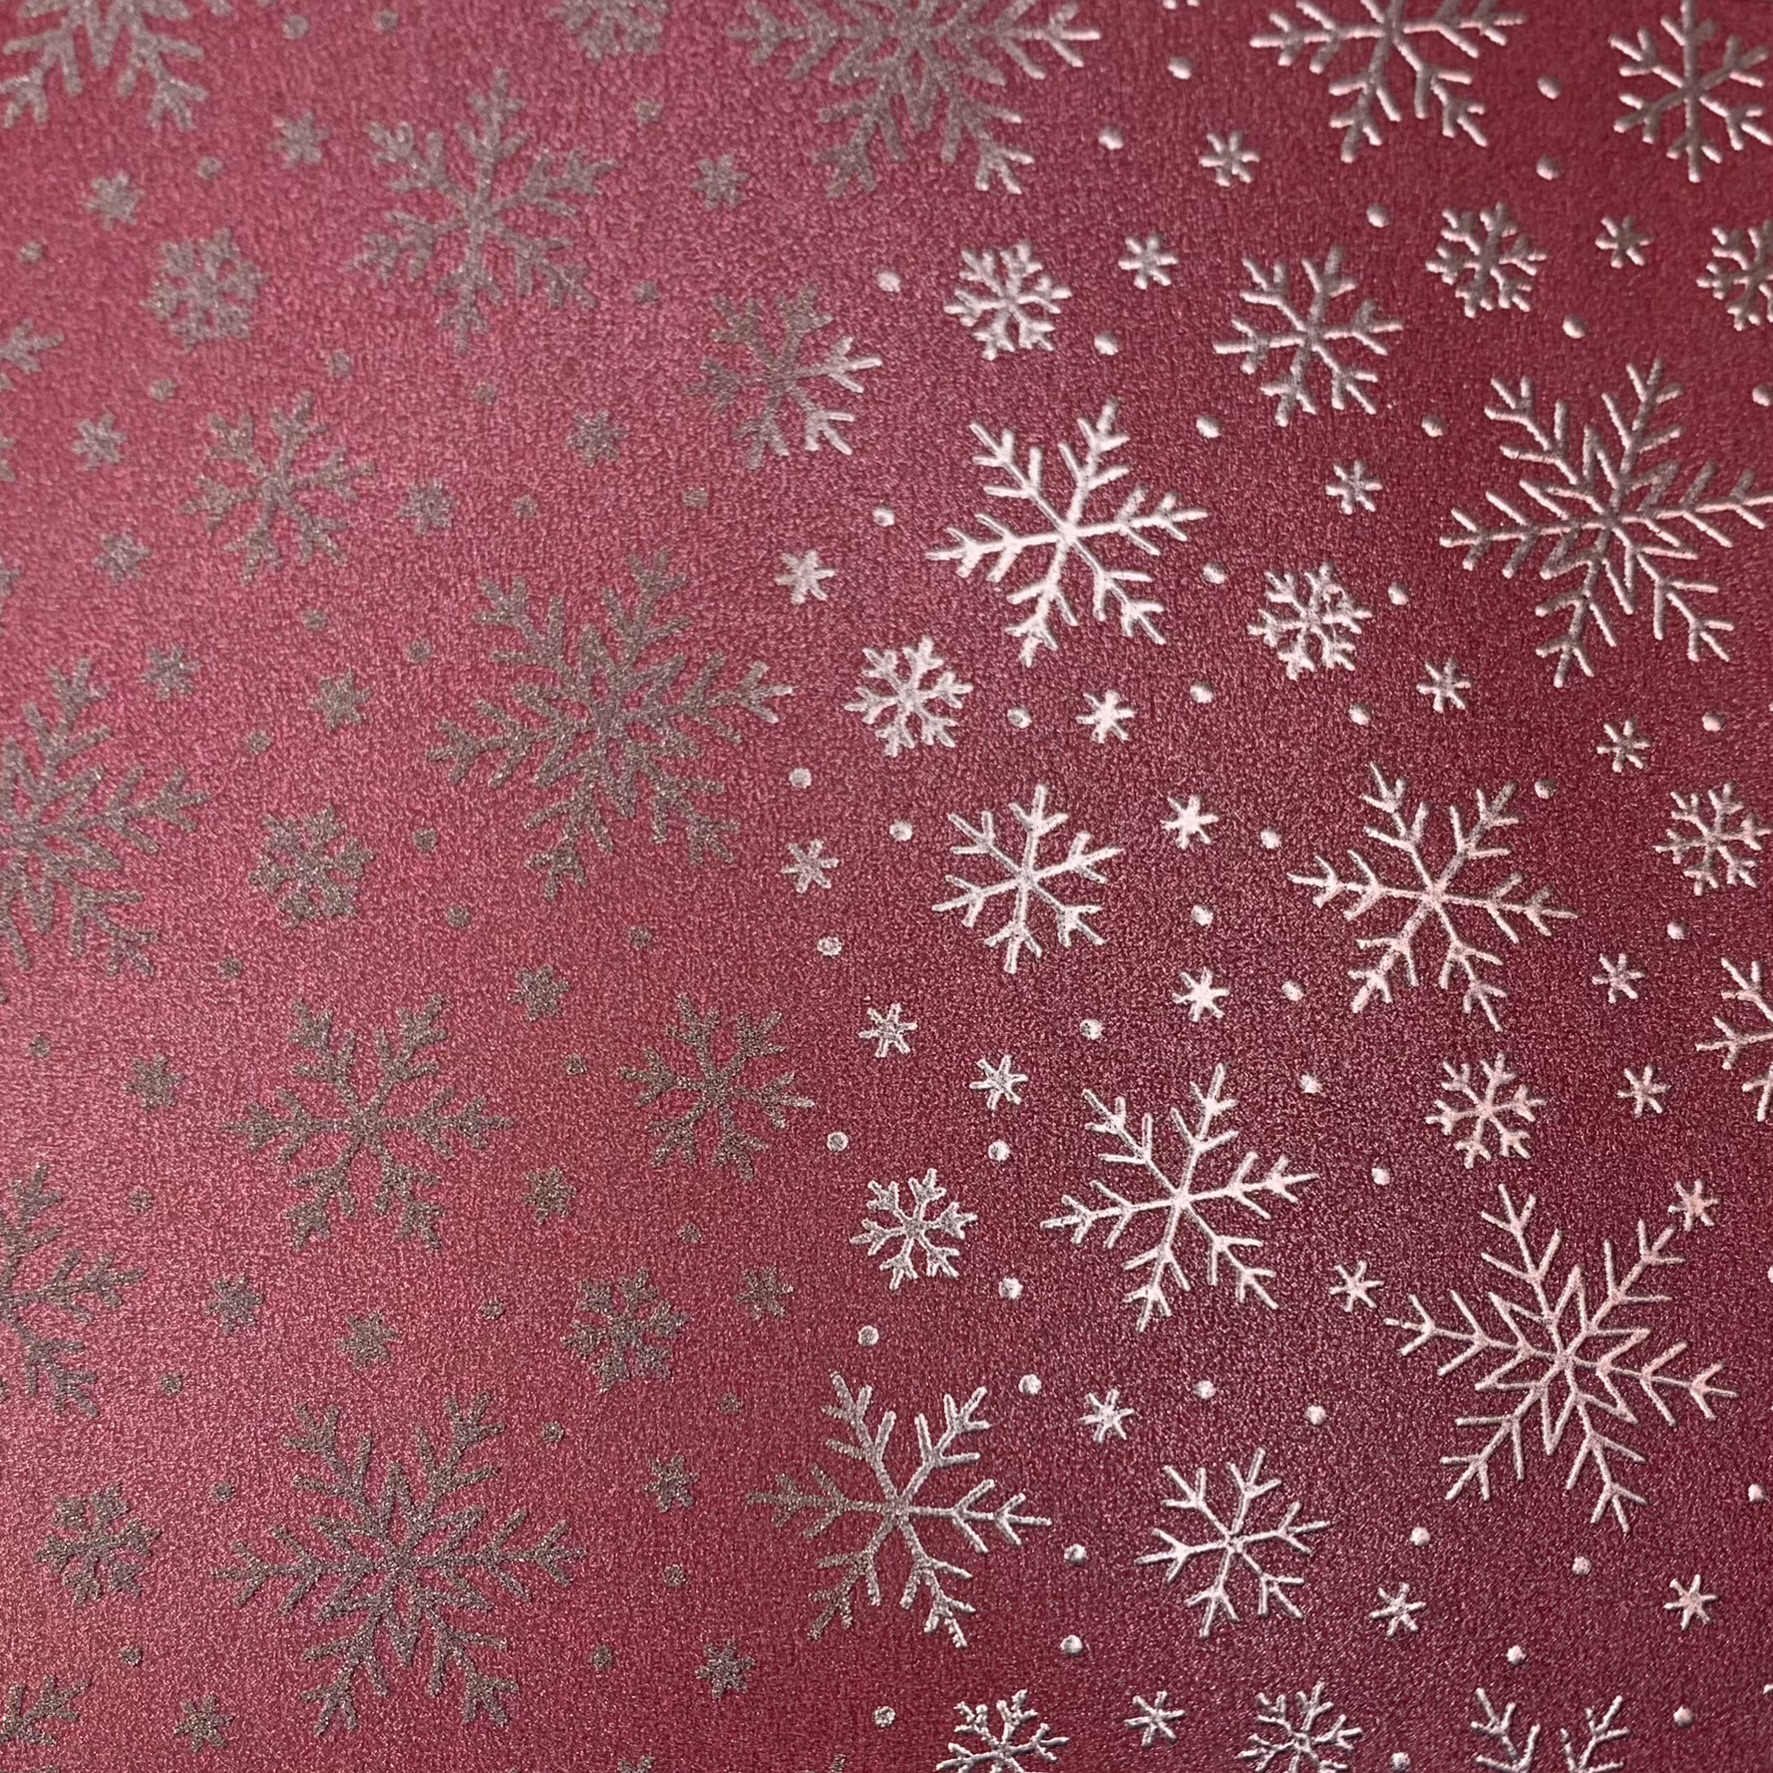
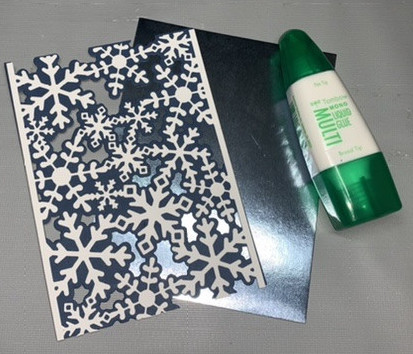
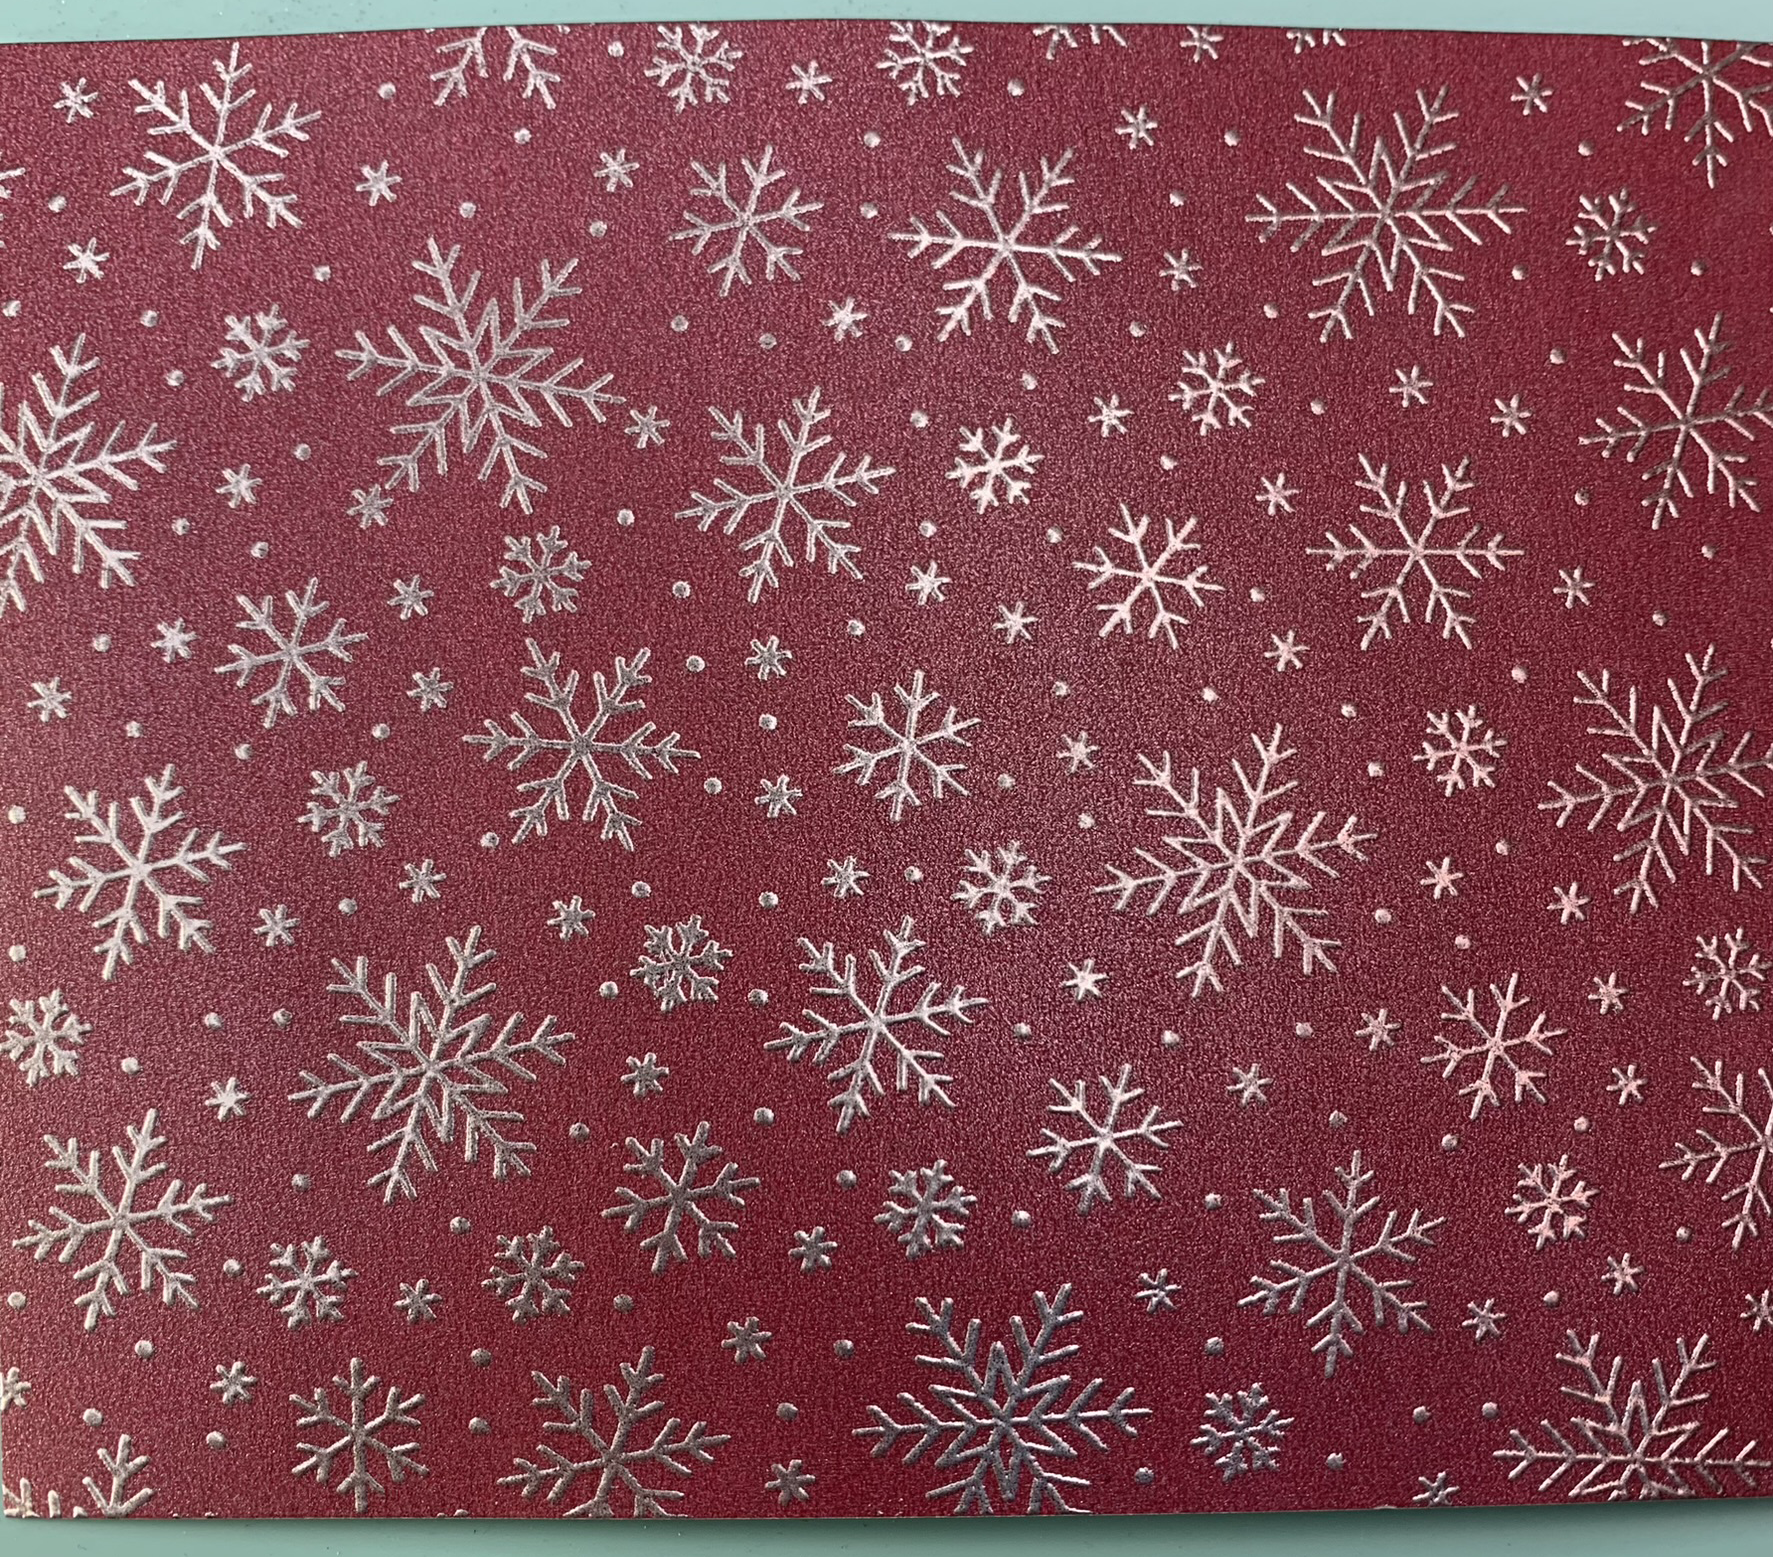
The picture below was taken after the whole piece of cardstock was heat embossed. The photo really doesn’t do it justice but just know that once the stamped image has been heat embossed, the silver will really jump off the card! Heat embossing the image gives it a shiny, polished effect.

Repeat the process above with the blue, green and white pieces of cardstock.


Stamp the Sentiment

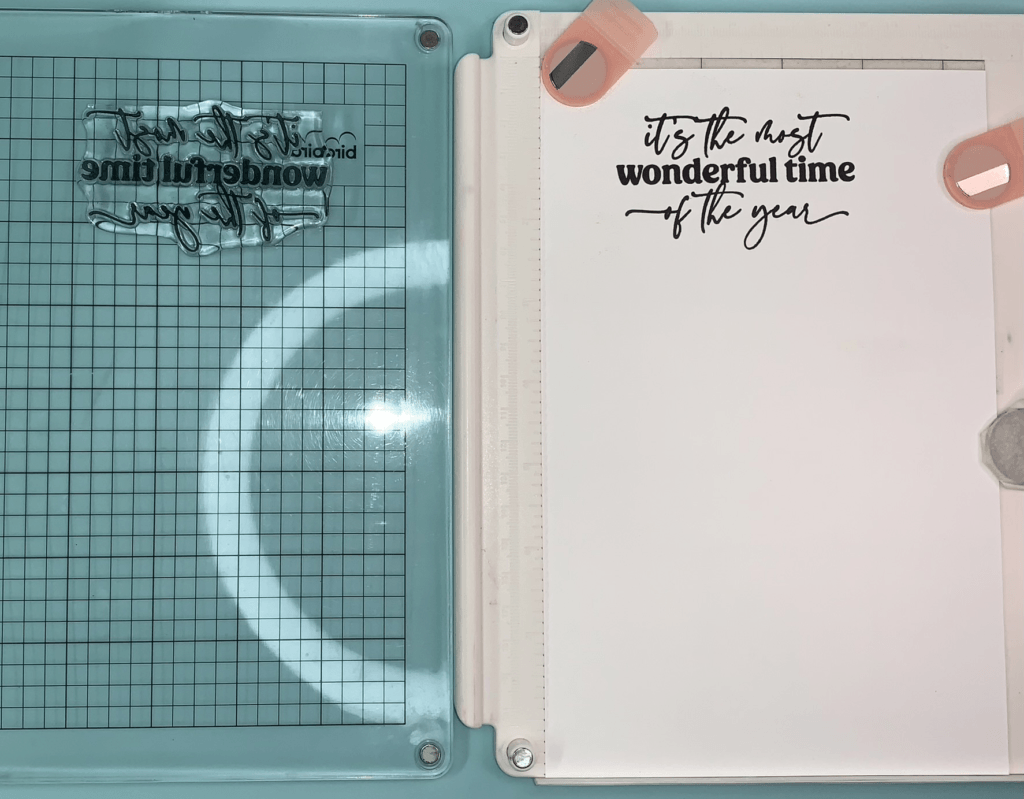
Once I have finished stamping the snowflake image onto the cardstock, it’s time to create the sentiments/wording that will go onto the front of the cards. I put a piece of white cardstock on my stamping platform and placed the sentiment stamp face down (without ink) onto the cardstock (this is the same process as stamping the snowflake image which is described above).

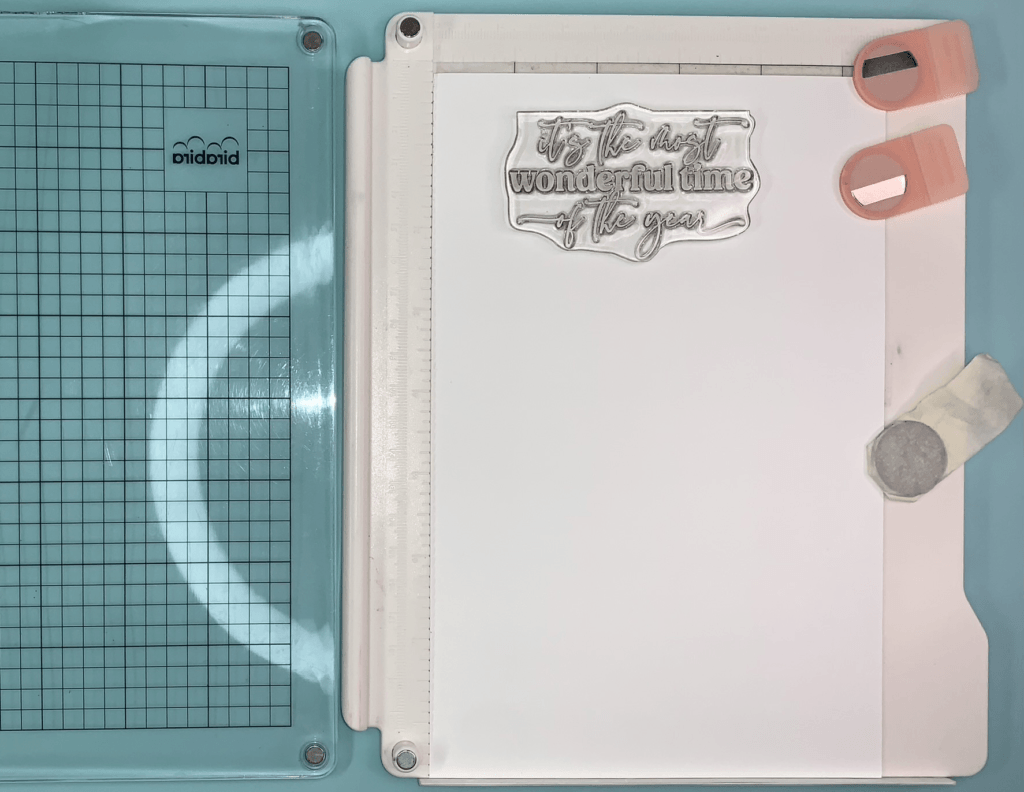
Then I close the top clear piece of the stamping platform onto the stamp and push down, which adheres the stamp to this piece. Next, I dab my anti-static bag onto the cardstock to get rid of any static electricity.

Because I plan to heat emboss this sentiment, I use black pigment ink instead of black dye ink (embossing powder doesn’t stick to dye or some hybrid inks) to ink my sentiment stamp.

Depending on how the stamped image comes out, I may re-ink and re-stamp one or two more times. While the ink is still wet on the cardstock, I cover the stamped sentiment in clear embossing powder. Below is a picture of the sentiment with clear embossing powder on it prior to heat embossing.

Next, I heat emboss the sentiment with my heat gun. After it has been heat embossed, the sentiment has a nice shine to it. It also adds a bit of depth to the card because the heat embossing creates a raised effect on the card. Below is a picture after heat embossing and before being die cut.

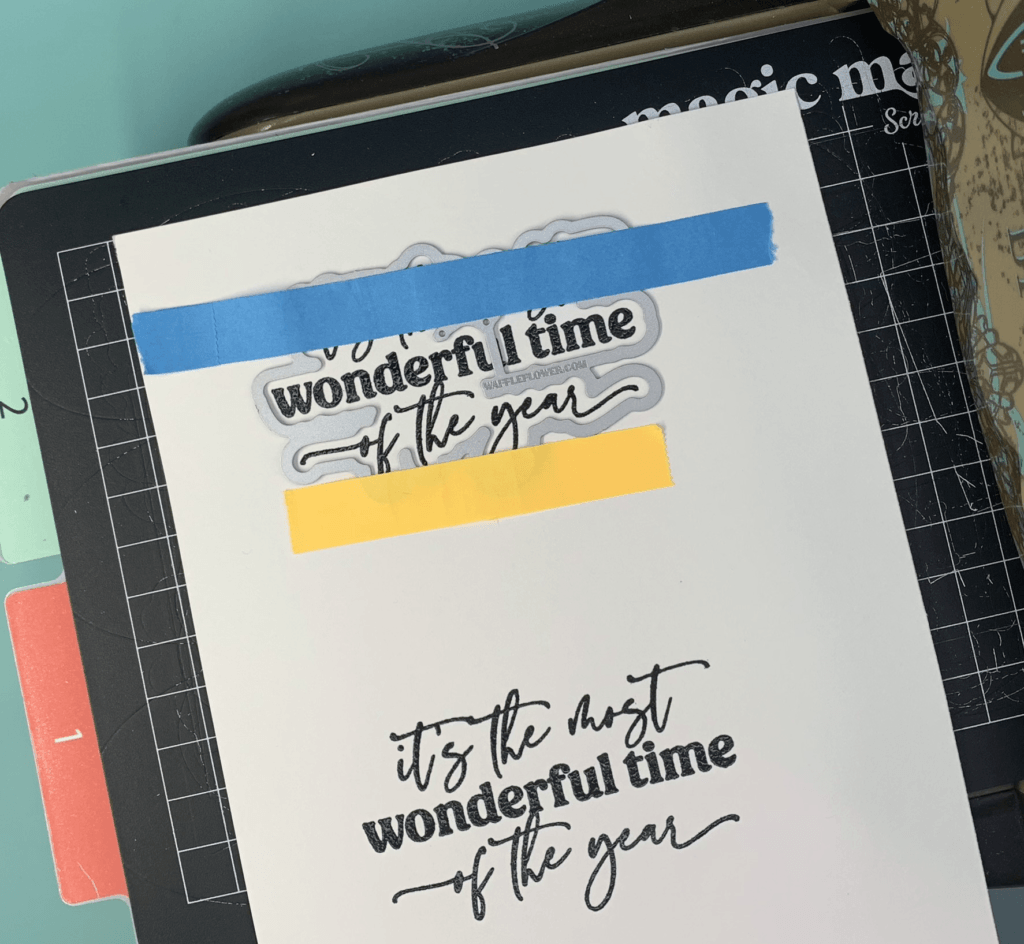
I repeat this process three more times so that I have enough for all of the cards in the set. If you plan to stamp more than one sentiment, be sure to leave enough room between them because you’ll be cutting these out with die cut frames. I usually put the frame around the first sentiment which gives me an idea of how much space I’ll need before stamping the next image. The image below shows this process.


Die Cut Oval Accent and Sentiment

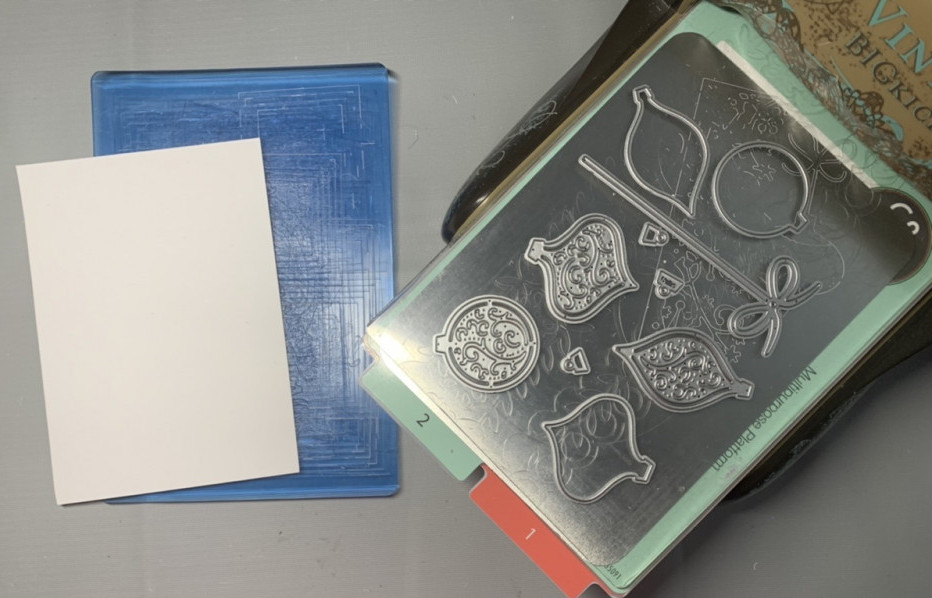
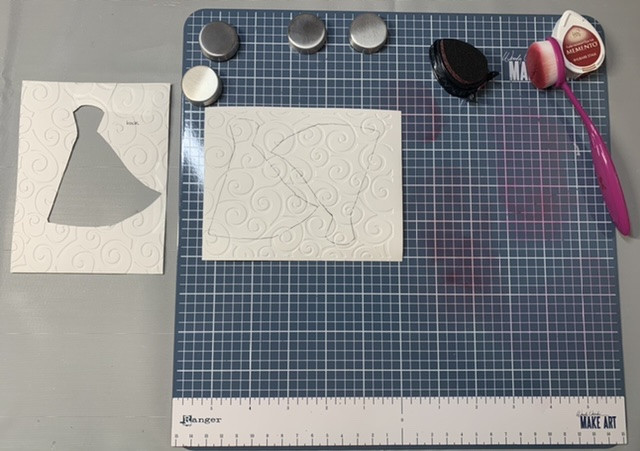
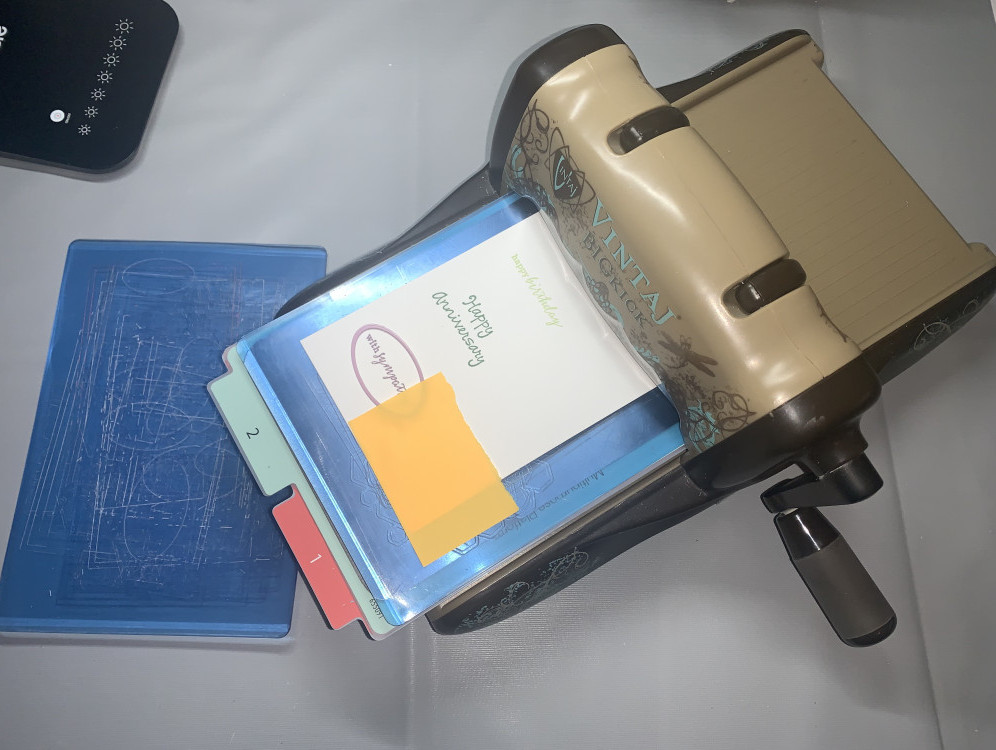
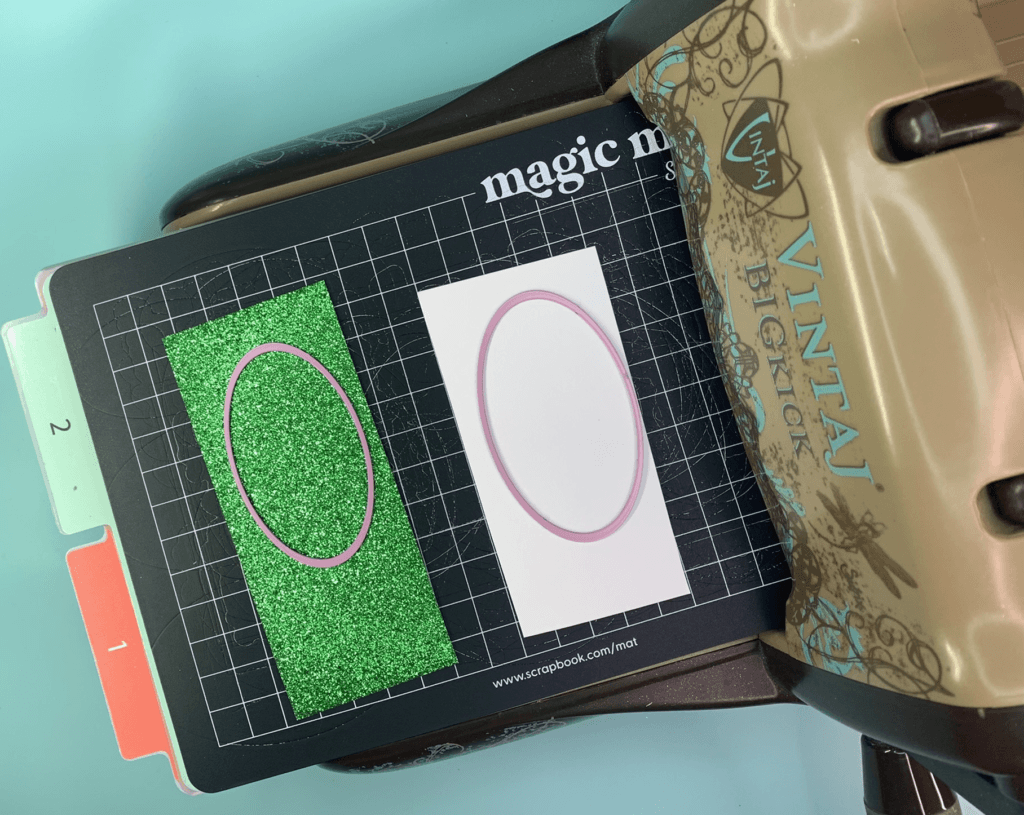
I decided that I wanted to have a layered oval tag to go behind the sentiment. First, I die cut both layers of each tag using my manual die cutting machine. The picture below shows how I arrange the paper and oval dies before putting on the top cutting plate and running it through the machine.

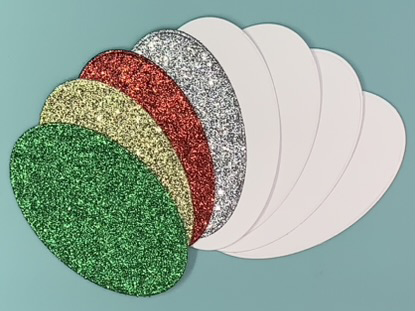
The result is shown below.

Next it’s time to die cut the sentiment with a die cut frame. Usually I will use a sticky note or washi tape to keep the paper and die in place while it’s going through the cutting machine, which is shown in the picture below.

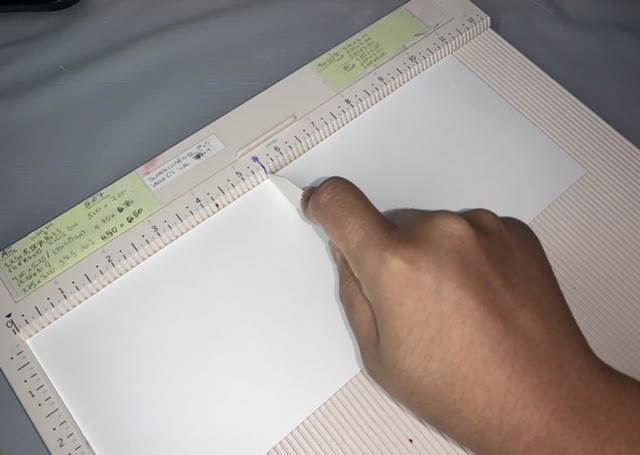
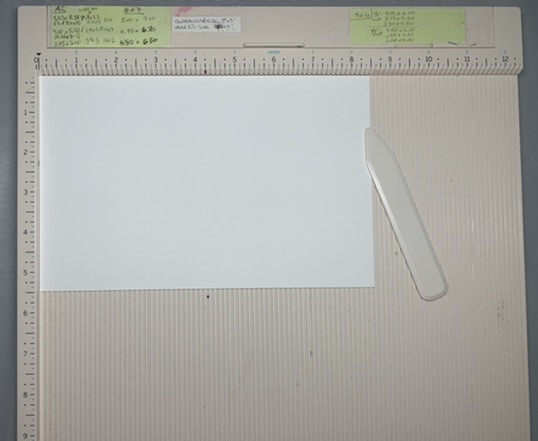
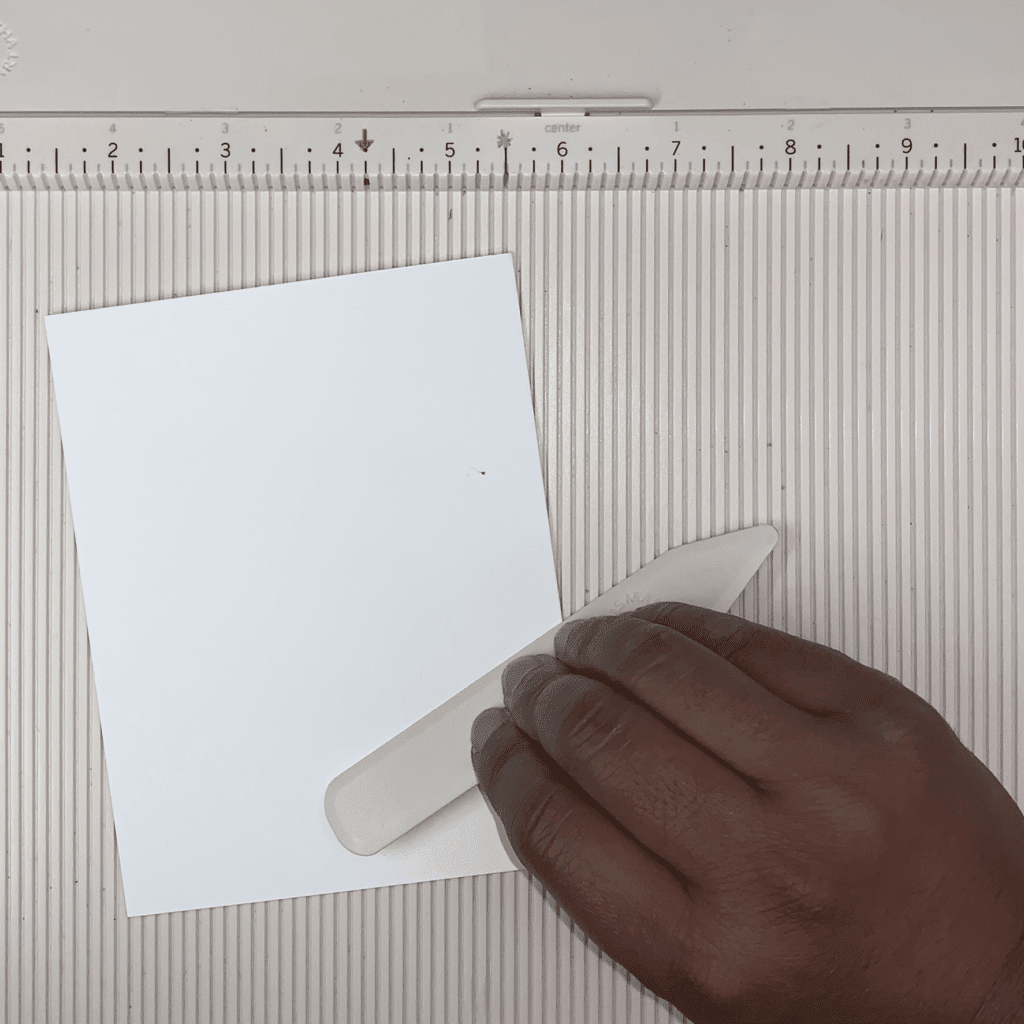
The next step is to create the card bases. I take a sheet of white cardstock and insert it into my paper trimmer so that the longest side goes left to right (landscape mode vs. portrait). I then trim the paper at 5.5″. After doing that, I score the card with my scoring board and bone folder so that the card base has a seamless fold at it’s center.

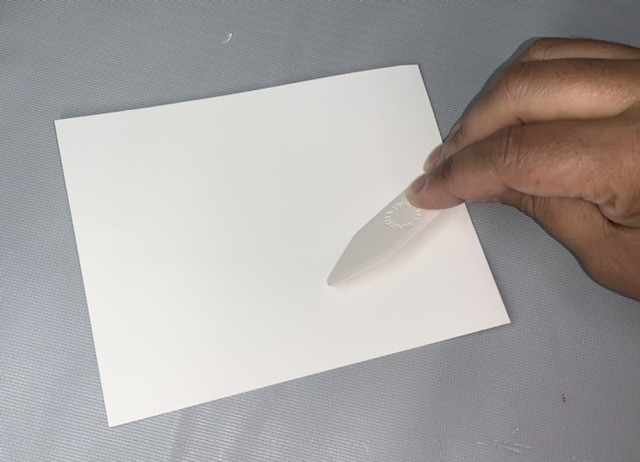
Then I fold the two parts of the card together and run the bone folder down the folded edge to flatten it.


Assemble the Final Cards

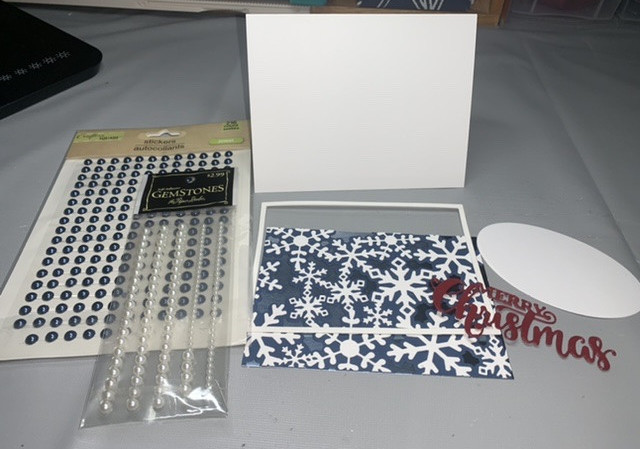
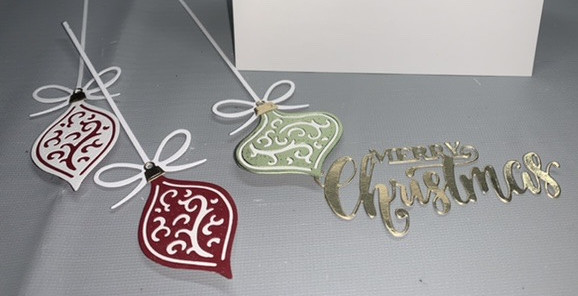
Now that all of the card pieces have been created, it’s finally time to put the cards together. Below is a picture of all of the card parts prior to assembly.

First, I glued all of the glitter ovals onto the white ovals.

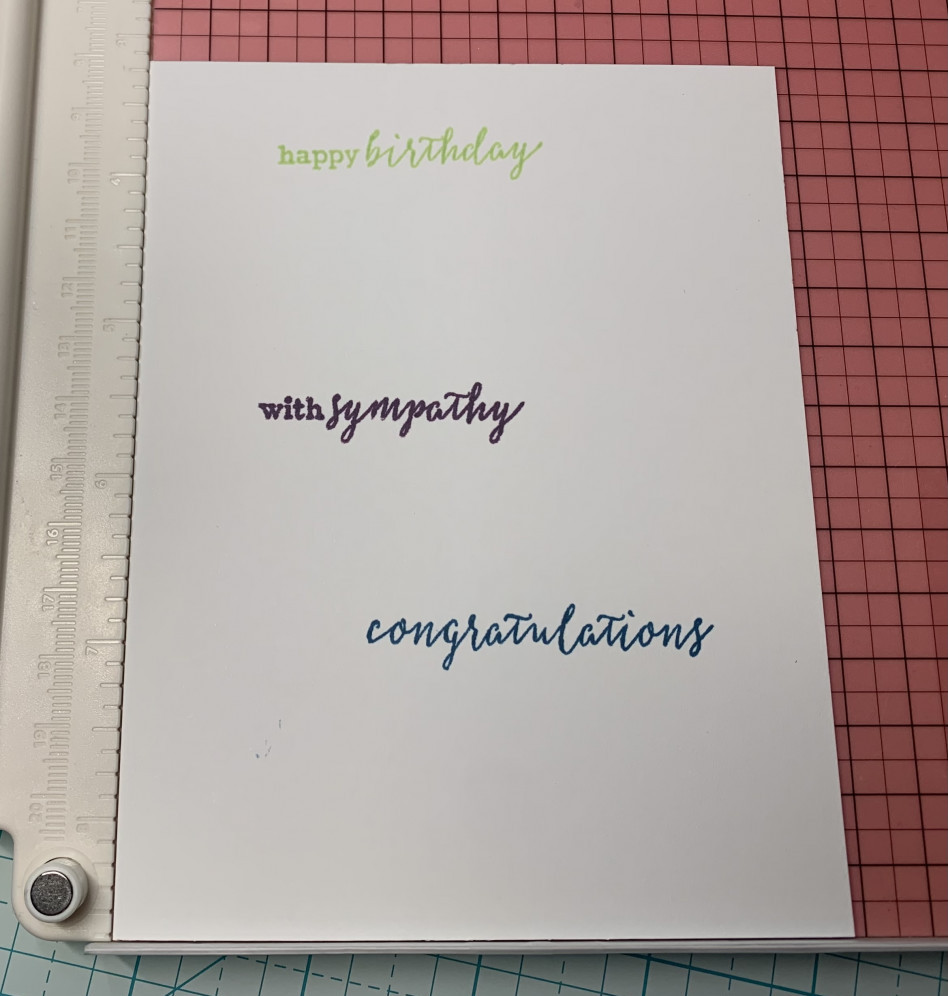
After doing that, I glued the sentiments onto the layered ovals. The finished sentiments are shown in the picture below.

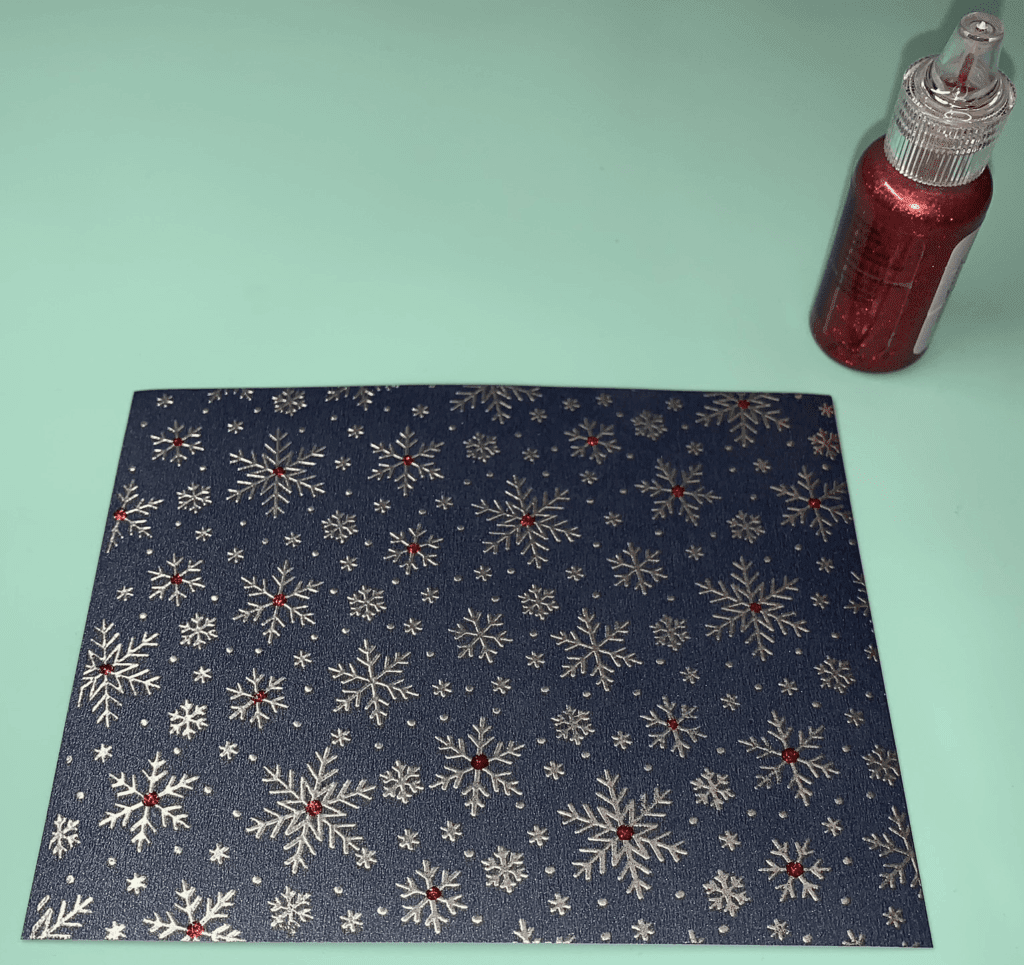
Next I added glitter glue in the center of the snowflakes around the perimeter of the cards.

Then I glued the sentiments to the snowflake background card pieces.

The final detail is to glue the snowflake card pieces to the white card bases. That’s it, you’re done! Below is a picture of the completed set of 4 cards.


Conclusion

Thanks very much for joining me as I showed you how to make a set of Homemade Snowflake Christmas Cards. I had fun and I hope you did as well. Hopefully making these cards will help you to be ahead of the game when the Holiday season comes around. Have a great day!

Supplies Used

Honey Bee Stamps Vintage Holiday Collection Falling Snow Background Stamp

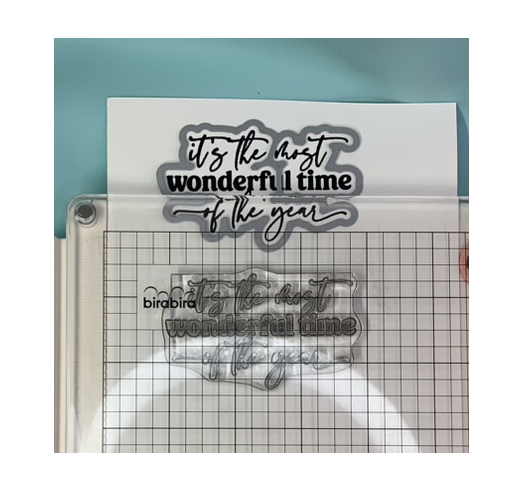
Waffle Flower Wonderful Christmas Stamp & Die Set

WOW! Embossing Powder – Silver

Bira Craft A5 Stampingpro Stamping Platform

Misti Stamping Platform

Neenah Classic Crest Cardstock – Solar White, 110 pound weight

Gartful Shimmer Cardstock Paper 120 Sheet, Pearlescent Card Stock 8.5×11 inch – 20 Assorted Color – 90lb-250gsm, Craft, Scrapbook, Party Decor, Cover, Gift Wrapping, Wedding Invitation, Birthday Card

Misti Stamping Platform

Recollections Glitter Cardstock

Stampendous Anti-Static Pouch

Tsukineko Versamark Ink Pad

Recollections Stamp Cleaner

The Paper Studio Embossing Heat Tool

Tim Holtz Paper Trimmer

Nellie’s Choice Nesting Ovals

Recollections Clear Embossing Powder

TsukinekoVersafine Black Pigment Ink

Ranger Stickles

Tombow MONO Multi Liquid Glue, 0.88 Ounce

Vintaj Big Kick Die Cutting/Embossing Machine

Embossing Folder Card Ideas

Hi there! Today I’m bringing you two embossing folder card ideas. I’ll call the first one the Diagonal Stripes Card, which is shown in the picture above.

I’ll call the second one the Wood Grain Flower Card:

Please join me as I show you how I made these two cards!


Diagonal Stripes Card

For this card, I first started with some white cardstock and various rolls of washi tape that I had in my stash. I laid out each strip onto the cardstock just below the previous strip so that no cardstock was showing in between strips.

Below is a picture of how the cardstock looked when I was finished applying the washi tape:

My next step was to cut the washi tape cardstock piece into strips of various sizes with my paper trimmer. No need to be precise about the width of each piece as long as you have a couple of different widths for each style of washi tape. Using a paper trimmer would be the quickest and most precise way to do this. I also added in a few colors from my cardstock stash in case I wanted more color variety on my final card. This is how the pieces looked after trimming:

The next thing I did was to adhere the strips to one side of a double-sided adhesive sheet. I used an adhesive sheet instead of glue because I thought it would be a cleaner application and I wouldn’t have to worry about gluing the back of every piece, which could be very time consuming and could result in glue trying to squeeze in between each strip. I knew I was going to have these strips peeking out from a heart-shaped die cut window on the front of my card, so I knew I had attached enough strips once the strips filled the entire shape of the heart die. Here is how the strips looked once they were attached to the adhesive sheet:

Once that was finished, it was time to make the card front with the heart-shaped window. As shown in the picture below, I placed the heart-shaped die on a piece of white cardstock and ran it through my die cutting machine. When using a die cutting machine to cut shapes out of paper, crafters often refer to a “sandwich” of materials that they use to ensure a clean cut when inside of the die cutting machine. The sandwich that I use for most of my dies is (from bottom of the sandwich to the top) is Sizzix Multi-Purpose Platform with both tabs closed, metal shim adapter (this helps both simple and intricate dies to cut the paper more cleanly), clear cutting plate, cardstock, die and another clear cutting plate as the top layer. I left the top cutting plate off in the picture below because both of my cutting plates have so many cut lines on them that you wouldn’t be able to see though them 🙂

After cutting the heart shape out of the cardstock piece, I placed the cardstock piece with the heart-shaped hole in it inside of my embossing folder and ran it through my die cutting machine again, but this time the sandwich was: Sizzix Multi-Purpose Platform open to Tab 1, clear cutting plate, embossing folder with the cardstock piece inside and another clear cutting plate on top. The picture below shows that cardstock piece inside the embossing folder before I close it and the Multi-Purpose Platform open to Tab 1.

Once my cardstock piece has been embossed, I took my washi tape strips piece and placed it behind the heart window and moved it around until the strips were going the same direction as the diagonal lines on the cardstock piece as shown below. After I had it aligned, I taped the washi tape piece onto the back of the white, embossed cardstock piece, and the result is shown in the picture below. Once I was sure that I didn’t want to change anything around, I glued the washi tape piece onto the back of the cardstock piece with the heart-shaped window, and the result is shown below.

Next, I cut off the extra washi tape that extended beyond the top of the white cardstock. After that, it was time to stamp the “Thinking of You” sentiment onto some white cardstock. Because the washi tape rolls were a new purchase, I wasn’t quite sure which of my stamp pad colors would match the best, so I tried a few different colors. The picture below shows the sentiment stamped with my Bira stamping platform and Distress Oxide Dusty Concord ink. Remember to always rub an anti-static tool onto whatever paper you will be using. Doing this eliminates any static electricity present that might make your stamped image turn out less clear.

The Dusty Concord didn’t match the washi tape very well, so I tried a few other colors before settling on my ColorBox Elderberry stamp pad. Each time that I stamped the sentiment, I immediately covered the stamp with clear embossing powder and heat set it with my heat tool which gives the stamped image a nice, glossy finish. This adds a bit more interest to the card.


Putting The Card Together/Finishing Touches

After I stamped the sentiment in the correct color, I cut it out and cut two other blank strips of the same size to glue to the back of the sentiment. That way, when I glue it into the card, it will have a bit of height that will add dimension to the card. The picture below shows the remaining elements of the card that need to be put together.

Next, I used my scoring board/bone folder to make the top fold of the card. I glued the card front to a colored piece of cardstock that matched both the washi tape and the sentiment ink color. This helps to break up all of the white on the card front and gives the card a bit more interest. Then I glued the “THINKING OF YOU” sentiment to the card front a bit below the middle of the card. Finally, I glued the card front to the folder card base.

That’s it for how I made the Diagonal Stripes Card! Here is another look at the final product:


Wood Grain Flower Card

I made this card for my Mom for Mother’s Day, and I think she really liked it. That made me happy since she always makes me so happy!

When trying to decide what kind of card I wanted to make, I had two requirements: first, the card had to incorporate my Mom’s favorite color, which is a teal/aqua color; and second, I wanted to use my alcohol markers on vellum in some way. So I decided to stamp and die cut a flower using vellum, which is a semi-sheer, semi-opaque kind of paper. The first thing that I did was to rub the vellum with an anti-static pouch, which eliminates any static electricity that could make your stamped image not as clear. Below is a picture of the image stamped onto the vellum using embossing/watermark ink, which is a clear, sticky ink.

After I stamped the image with the embossing ink, I immediately covered the image with silver embossing powder, tapped off the excess, then heated it with my heat tool to melt the powder onto the ink. The picture below shows the same flower image stamped three different times, each one covered with a different color of embossing powder. The first flower is heat embossed with silver embossing powder, the second with white embossing powder and the third with a pearlescent embossing powder.

Once I was done heat embossing the stamped flower image, it was time to cut it out using the coordinating die and my die cutting and embossing machine. Below is a picture of the flower die taped to the vellum so that it doesn’t shift while it’s going through my die cutting and embossing machine (you may want to do some sample stamping and die cutting before starting your project). If you’re having trouble getting a clean die cut, I suggest you add a piece or two of cardstock shims to your cutting “sandwich.” You could also try placing your die with the cutting side face up (cutting side facing the ceiling) in the sandwich or you can buy a metal cutting adapter/shim.

Below is a picture of the vellum flower once it has been die cut.

Next it was time to color the vellum flower. You can color on the front of the stamped image or on the back. I find coloring on the back to be more forgiving in that if you go over the lines a bit, it’s much more noticeable on the front. Also, I like the more subtle color that happens when you color the back of the image. Below is a picture of a vellum flower with the top colored in on the front and the bottom colored in on the back so that you can see the difference. Coloring on the front also results in more streaky lines.

When I made this Mother’s Day card for my Mom, I didn’t have time to take pictures of each step, so here’s a picture of another vellum die cut flower that I colored in on the back:

I used Spectrum Noir’s Triblend marker in Green-Turquoise because it’s 3 markers in different shades (Light, Medium and Dark) of the same color. I used all three shades but, due to my inexperience with alcohol marker blending, it’s hard to see the different shades in the final product. You live and learn, am I right??

Next, it was time to make the background piece for the card. Once I found the colors I wanted to use, I used my blending brush to apply the colors to the cardstock. Below is a picture of the cardstock once I finished applying the ink:

At this point it was time to add some texture to the inked piece of cardstock, so I put it into an embossing folder and ran it through my die cutting/embossing machine.

I had recently purchased two embossing folders and wanted to try them both out, so I inked up another cardstock piece in the same colors and embossed it with the other embossing folder. Below is a picture of a white and two colored pieces of cardstock embossed with the two embossing folders:

I really liked the textures that both of the embossing folders produced, but I ultimately decided to use the wood grain- textured background (the one on the right).

After I finished the background, it was time to stamp my “happy mother’s day“ sentiment with Memento’s Teal Zeal Dye Ink, which matched both the background and the marker that I used to color the vellum flower. I rubbed my anti-static bag onto my cardstock before doing any stamping. This reduces the static electricity and increases your chances of stamping a clearer, crisper image. When I stamp sentiments, I usually stamp more than one so that I have extras for later. I positioned my stamp at the top of my cardstock piece, closed the stamping platform to affix the stamp to the stamping platform cover, inked my stamp then stamped the image. Each time I stamp, I raise the cardstock piece a small amount so that it is in the correct position for another stamp. In a short time, you’ll have many extras for other projects! The picture below shows me stamping multiple sentiments at the same time.

After I stamped the sentiment, I cut it off of the larger cardstock piece with my paper trimmer. Then I used my corner rounder to round the corners of the top left and bottom right corners. Below is a picture of the sentiment after it has been stamped, cut to size and has had two of its corners rounded.


Putting The Card Together/Finishing Touches

After finishing the individual card elements, it was time to assemble the final card. I used my paper trimmer, scoring board and bone folder to make a top-folding card base.

I cut a Letter-sized (8.5″ x 11″) piece of cardstock in half lengthwise which gave me two pieces that were 4.25″ x 11″, as shown below.

Then I used my scoring board/bone folder to make the top fold of the card. The pictures below show me scoring the cardstock then using the bone folder to make a sharp crease.

Next, I glued the vellum flower onto the teal wood grain background piece and I glued the sentiment at the base of the flower a bit to the left of center. Finally, I glued the background piece onto the white card base, and there you have it-the card is finished!

Here’s another picture of the finished card:


Conclusion

That’s it for today! I had a great time showing you my two embossing folder card ideas, and I hope you did too! Enjoy your day.

Supplies Used

Neenah Classic Crest Cardstock – Solar White, 110 pound weight

Recollections Purple Passion Paper Pack (5th in the pack)

Kwan Crafts Words Clear Stamps for Card Making – “happy mother’s day“

Bira Craft A5 Stampingpro Stamp Platform

Anti-Static Bag by Recollections™

Recollections Stamp Cleaner

The Paper Studio Embossing Heat Tool

Tombow Mono Multi Liquid Glue, 0.88 Ounce

Martha Stewart Crafts Scoring Board Tool for Making Cards, Envelopes, Giftboxes and More, Off-White, 12″ x 12″

Sizzix Vintaj Big Kick Die Cutting/Embossing Machine

Sizzix BIGkick/Big Shot Multi-Purpose Platform

CottageCutz CCSHIM1 Universal Shim Plate Die Cuts

Hero Arts DI198 Infinity Dies, Nesting Rectangle

Rainbow Clear Stamp & Die Set by Recollections™

Park Lane A2 Embossing Folder “Stripe”

Tim Holtz By Sizzix Lumber Texture Fades Embossing Folder

Tonic Studios Tim Holtz Comfort Trimmer 8.5″

Colorbox Archival Pigment Stamp Pad Boysenberry (I purchased this a long time ago. It is now called Archival Pigment Ink Pad by Recollections™)

Momenta Star & Heart Layered Dies (Hobby Lobby)

Post-it Super Sticky Full Stick Notes, 2×2 in, 8 Pads, 2x the Sticking Power, Rio de Janeiro Collection, Bright Colors (Orange, Pink, Blue, Green) (for keeping paper in place when die cutting with the Big Kick)

Hero Arts AF389 Bold Ink Cubes, 4-Piece, Tropical Waters (Summer Sky, Aquatic, Indigo and Deep Ocean)

Stewart Superior Corp (Papertrey Ink) Clear Filigree Fine Embossing Powder

Tsukineko Memento Dew Drops Fade Resistant 4-Pack Dye Inkpads Assortment, Dolphin Play (Elderberry, Teal Zeal, Nautical Blue, Gray Flannel)

Daiso Masking tape, Z, 4 pcs, 0.6 in x 3.3 yd, 10pk (Daiso’s website only sells a fraction of what they sell in their stores, and the website requires you to buy items in sets of 10. Of all of the Washi tape that I used for this card, I could only find one set online.)

Personal Stamp Exchange Embossing Powder – Silver

(I don’t think this is being sold brand new in stores anymore. If you want this exact brand, you’ll need to buy it on eBay, Mercari, etc. Any silver embossing powder should give you similar results.

Clear 8.5″ x 11″ Vellum Paper by Recollections™, 40 Sheets

Spectrum Noir Blend Triblend Blendable Alcohol Marker 3 Colours in 1 Pen-Green Turquoise

Yoseng 10 Colored Ink Blending Brushes for Card Making, Craft Broad Application Assortment Paper Crafter Color Code Handle with dust Cover (Rainbow 4)

Die Cut Christmas Card Ideas

Hi everyone! Today I’m bringing you two die cut Christmas card ideas. I decided to call the first card I made the Snowflake Card, which is shown in the picture above.

I called the second card that I made the Ornament Card, shown below:


Designing the Snowflake Card

The Snowflake Card was fun to make once I got my momentum going. I was out of the colored cardstock that would have been my first choice (green and red foil) which slowed me down a bit at first. Here are the colors that I chose:

Once I chose my colors, I began making the different card pieces. At the very bottom of this post I’ll list the supplies I used to make both cards. First I cut out the snowflake background pattern using my Sizzix Vintaj Big Kick (very similar to the Sizzix Big Shot) Cutting machine. For those of you new to papercrafting, the Big Kick is a machine that uses the pressure from two large rollers to cut the paper into the shape of the die.  A handle moves the cutting machine “sandwich (two cutting plates with the paper and die in between them)” through the two rollers and out the other side.

On a side note, if you aren’t getting a clean die cut after you’ve rolled your paper and die through the cutting machine, I highly recommend getting some sort of metal shim that you put on top of your base platform and underneath your cutting sandwich. I was not getting clean cuts with this die until I used this shim.  Most of the major manual cutting machine manufacturers sell some version of this.  Here’s a picture of the one I purchased:

Once the snowflake die cutting is done, I weeded out all of the pieces that are “negative space,” which are parts of the paper that the design was just cut out of.  This is what the paper looked like after being run through the Big Kick and after I weeded out a few pieces of the cardstock that I no longer needed:

This is how the two die cut layers look before being glued together:

I glued the two pieces together which created a nicely layered look.  Next, it was time to attach the foil cardstock background to my layered die cuts.

Once I did that, I used my Big Kick and a rectangle die to cut out a rectangle frame. I repeated this process twice so that I had three frames total.  In the picture below, you’ll see that my dies are attached on the back with masking tape.  I do this so that my frames are the same sizes each time I cut.  I glued each of the same sized frames on top of the other so that I had a sturdier frame to work with.  I really like how the layered frame adds some dimension to the card.  I learned this tip from Jennifer McGuire.  If you haven’t seen any of her YouTube videos, I highly recommend that you do. She has TONS of ideas and tips to help viewers with their card making.

Next, I scored the cardstock that I would be using for both cards.  I used a scoring board and a bone folder. The scoring board has a bunch of vertical grooves in it that the tip of the bone folder fits into. If you can see the red dots at the halfway point of this paper (at the top and bottom), that shows me which groove to put my bone folder into as I slide it from top to bottom.  Doing this stretches the paper so that when you fold the card, it will be a smoother line at the location of the fold.

Then I used the Big Kick and the “Merry Christmas” die to cut the phrase out of the paper.  The last thing to do before putting the card together was to cut out an oval mat to put the “Merry Christmas” die cut on.


Here’s a picture of the various card parts before putting the card together:


Assembling/Finishing the Ornament Card

Once I had all of the individual card parts, it was time to put everything together.  First I glued the stacked/layered frame to the layered snowflake piece. Next I used my Zig Wing of Stella Pen to add some sparkle to the “Merry Christmas” die cut.  After I let it dry, I glued it to the oval mat.  The next step was to glue the matted sentiment to the layered snowflake, and then glue that piece to the white card base. Finally, I added a few flat-back pearls of various sizes and colors onto the sentiment mat.  During each step where I glued one piece to another, I put the piece on a flat surface and put 3 heavy books on top of it for 5-10 minutes.  This gives the glue some time to bond to the paper.  Jennifer McGuire taught me that too 🙂

Here’s a picture of the finished card:


Designing the Ornament Card

My first task with the Ornament Card was to pick out the cardstock colors.  Here’s what I chose:

Next, I cut out the ornament shapes with my ornament dies and die cutting machine. I did this with each of the four sheets of cardstock shown above.

I also die cut another “Merry Christmas” sentiment, but this time I used the gold foil cardstock.

Here are all of the die cut pieces before I started layering them. The die set came with a pine branch die which I ended up not using in the card.  I used the Zig Wing of Stella Pen to add some sparkle to a few of the red cardstock pieces.


Assembling/Finishing the Ornament Card

Once all of the card elements had been prepared, I started playing with the different color combinations to see which colors layered the best with the other colors. Here are the color combinations that I chose:

Once I layered the ornament pieces together, it was time to glue it all to the card base.  I tried to stagger the height of the 3 ornaments while still making room for the “Merry Christmas” sentiment.  Once I was happy with the placement of the ornament and the sentiment, all that was left to do was to put a flat-backed pearl in the hole where the bow of the string meets the ornament.  Here’s a picture of the finished card:


Conclusion

That’s it for today, folks! I hope you enjoyed my die cut Christmas card ideas. I really enjoyed making these cards, and hopefully this post sparked some creative ideas in you so that you’ll have some Christmas card ideas ready for the holiday season. See you next time!

Supplies Used:
Neenah Classic Crest Cardstock – Solar White, 110 pound weight

Papertrey Ink Cardstock – Enchanted Evening

Recollections Pastel Foil 8.5″ x 11″ Cardstock Paper, Blue and Green

Recollections Shades of Red Cardstock Paper (3rd in the pack)

Ammsochy Cutting Dies 3D Backgrounds Frame Metal Stencils Scrapbooking Tools DIY Craft Carbon Steel Embossing Template for Paper Card Making Album Arts Crafts Supplies (Snowflakes Die)

Sizzix Vintaj Big Kick Die Cutting/Embossing Machine

Exacto Knife Style + 6 blades #11 x-acto Hobby Multi tool Crafts Cutting

Caydo 11 Pieces Craft Vinyl Weeding Tools Stainless Steel Precision Craft Basic Set Craft Vinyl Tools for Weeding Vinyl

Post It Notes (for keeping paper in place when die cutting with the Big Kick)

CottageCutz CCSHIM1 Universal Shim Plate Die Cuts

AHTOLS Merry Christmas Cutting Dies, Christmas Tree Truck Die Cuts Metal Embossing Stencils Template Mould for Card Scrapbooking and DIY Craft Album Paper Card Decor

Martha Stewart Crafts Scoring Board Tool for Making Cards, Envelopes, Giftboxes and More, Off-White, 12″ x 12″

Hero Arts DI198 Infinity Dies, Nesting Rectangle

Tombow Mono Multi Liquid Glue, 0.88 Ounce, Single

3 Pieces Christmas Metal Die Cut Assorted Silver Cutting Die Decorative Cut Stencil Manual Snowflake Die Christmas Die Crafting Die Cut for Card Making DIY Craft Scrapbook Embossing Embellishment

Accent Opaque White 11” x 17” Cardstock Paper, 80lb, 216gsm – 250 Sheets

Fiskars SureCut Portable Paper Trimmer, 12 Inch Cut

Nellie’s Choice Multi Frame Dies, Straight Oval

Zig Wink of Stella Glitter Pen

The Paper Studio Self-Adhesive Pearl Gemstones

Crafter’s Square Jewel Pearl Stickers

Wedding Card Making Ideas

Hello! Thanks for visiting my site. Today, I’ll be showing you two simple but elegant wedding card making ideas.

The first card that I’ll be showing you is what I call the Bride and Groom Card, which is shown in the picture above.

I called the second card the Wedding Bicycle Card, shown below:

Please join me as I show you how I made these two cards!


Bride and Groom Card

Most of the parts for this card are items that I purchased from the Silhouette Design Store website.  Silhouette is a company that makes electronic cutting machines (somewhat similar to Cricut) like the Cameo and the Portrait.  I currently use the Portrait 3 which is a smaller, less powerful version of the Cameo 4.  On the Silhouette Design Store website, you can purchase printable images, cutting designs and fonts (and more) from their online store for a very reasonable cost, then use your cutting machine to cut or draw the designs.  I usually go back and forth between mostly using my Portrait and then mostly using my Sizzix Vintaj Big Kick (manual die cutting machine like the Sizzix Big Shot), and I’m solidly in my Portrait phase right now. I’ll put a list of the supplies I used to make these two cards at the bottom of this post.

Normally I pick my card colors before deciding the card design, but this time I picked the card designs first which helped me to decide which colors to use.  Because both cards are wedding cards, my color choices are narrowed down quite a bit.  Typically, I use white, gold, silver/gray and muted colors for wedding and anniversary cards.  Here are the colors that I chose:

Once I chose the colors, it was time to choose the card design. I found a cute design that I liked but once I cut it out, I didn’t like how the stripes in the brides dress looked with the embossed paper that I was going to use.  Here’s a picture of how the original bridal dress design looked with the embossed paper behind it.

This looked WAY too busy for my taste. I decided to edit the shape in Silhouette Design Studio by getting rid of the horizontal wavy lines.  Once I had the dress how I wanted it, I  used my Silhouette Portrait to cut out the card base as well as the groom’s bow tie.  For the bride’s dress, I used my D’vine Swirl embossing folder along with my Big Kick Die Cutting/Embossing Machine.

Once I cut out my card parts, it was time to use a darker red ink on the bride’s dress to coordinate with the groom’s bow tie. I used an ink blending brush and lightly brushed ink onto the raised parts of the dress.  Then I flipped the paper over and traced the dress outline onto the paper. I was happy that I could fit two dresses onto the one piece of paper because I love any opportunities to make card parts for more than one card at a time. That will save me time later when I go to make another one of these cards.

Next, I used a Zig Wink of Stella pen on the bride’s dress and on the groom’s bow tie.  The Wink of Stella pen is amazing!  It really adds that extra something to a card part and keeps it from looking basic.  Here’s a pic of the unassembled card parts:


Putting the Bride and Groom Card Together

On the inside of the card, I taped the black and red cardstock into the correct places so that the groom’s lapels would be black and his bow tie would be dark red.  Next, I did the same for the bride’s dress with my embossed and inked white cardstock. Finally, I glued the sentiment to its shadow, glued it to the card and added a few pearls in the upper-right area.   Here’s a picture of the finished card:


Wedding Bicycle Card

To make my life easier, I had planned to use a similar color scheme for both cards in today’s post.  But easy lives are boring, am I right?  The only color that the two cards have in common is the gray that I used as the card base for both cards.

After deciding which colored cardstock to use, it was time to choose my card design.  I came across a tandem bicycle card design in Silhouette’s Design Store and loved the idea of using it along with a cute saying for a wedding card.  I decided to use “better together.”  Here a screenshot of my computer as I was using the  Silhouette Studio software to size the designs just before cutting them.

Once again, I cut out the card elements using my Silhouette Portrait.  Unlike the Bride and Groom Card, all of this card’s parts were cut out on the Portrait.


Putting the Wedding Bicycle Card Together

Once all of my card pieces were cut out, it was time to assemble the card.

Here’s a picture of the finished card. I love how the pink metallic paper in the frame, the text background and the flowers catch your eye and pull the card together nicely.


Conclusion

That’s it for today, guys! I hope you enjoyed this post and got some wedding card making ideas that you can use for yourself. Thanks so much for spending some time on my site. Have a great day!

Supplies Used:

Silhouette Portrait 3

Silhouette Design Store Design #118970 TANDEM BICYCLE FOLDED WEDDING CARD

Silhouette Design Store Design #277819 BETTER TOGETHER

Silhouette Design Store Design #130421 WEDDING CARD

Silhouette Design Store Design #246703 BEST WISHES PHRASE

Neenah Classic Crest Cardstock – Solar White, 110 pound weight

Recollections Pastel Foil Cardstock Paper (2nd in the pack)

Recollections Shades of Red Cardstock Paper (3rd in the pack)

Recollections Neutrals Cardstock Paper (2nd in the pack)

Dark Blue/Purple and Light Blue/Purple cardstock – I’m not sure what company makes them. I bought them at a second-hand craft store that is now out of business.

Recollections Black Cardstock Paper

Fiskars SureCut Portable Paper Trimmer, 12 Inch Cut

Hero Arts Infinity Nesting Rectangles

The Paper Studio Self-Adhesive Pearl Gemstones

Crafter’s Square Jewel Pearl Stickers

Tsukineko Memento Dew Drop Dye Ink Pad – 301 Rhubarb Stalk

Cuttlebug Embossing Folder – D’vine Swirl

Zig Wink of Stella Glitter Pen

Tombow MONO Multi Liquid Glue, 0.88 Ounce

Vintaj Big Kick Die Cutting/Embossing Machine

Handmade Card Ideas

Hi there! Today I’m bringing you some handmade card ideas. For this project, I decided to make a set of cards that have a variety of sentiments. The above picture shows the finished set of cards.

Please join me as I show you how I made these cards!


Card Design

For this set of greeting cards, I’ll be using one of my favorite background stamps along with a watermark ink pad and clear embossing powder. At the end of this post, I’ll list the products that I used to create this card set.


Pick Cardstock Colors and Prepare Paper

Because I decided to make a set of cards, I wanted each color that I chose to be different enough from the others but I also wanted it to look like all of the colors went together. All of the colored cardstock used for this project is from Papertrey Ink.

I decided to start using their paper after discovering that they have color-coordinated cardstock, patterned paper, ink and embellishments. I’m a pretty matchy-matchy kind of card maker, so finding them was a dream come true for me!

Next, I cut my cardstock down to 4 inches by 5.25 inches (shown below) and will be orienting it with the longer edges on the top and bottom of the card (landscape mode if you were using a tablet).


Stamp and Cut Image and Sentiments

Once I’ve decided what colored cardstock to use and have cut the pieces down to the correct size, it’s time to move on to actually making the card. I used the watermark ink pad and my stamping platform to stamp the image onto my 5 pieces of cardstock.

This stamp used to be mounted on a wood block but I recently removed it so that I could use it with my stamping platform. Removing the wood block also helps a lot with storage since the stamp takes up waaaay less space.

This is what the cardstock looks like after being stamped and before applying the embossing powder and heat.

After I stamp the image, I immediately put clear embossing powder on it using a small spoon and then I dump what doesn’t stick to the image back into its container. The picture below shows embossing powder on the part of the card that’s inside the red circle.

There’s no need to do the entire image at the same time. I usually do a section at a time. This minimizes the chance that embossing powder will be everywhere when I’m done. I use the small paint brush to remove any embossing powder that is on the card that shouldn’t be (using an anti-static pouch prior to stamping your image minimizes stray embossing powder a lot). The picture below shows the stamped image with embossing powder on it before heat embossing it with the heat gun.

Once I’ve got the entire image covered with embossing powder, I use my heat gun to heat set the embossing powder. The heat gun essentially melts the embossing powder onto the stamped image. When I’m finished, the result is a beautiful shiny/glossy sheen on top of the stamped image. In the picture below, the right side has already been heat set/heat embossed.

Once the embossing powder has melted, immediately stop heating the area. I’ve learned the hard way that if you heat it for too long, the embossing powder actually evaporates and a lot of the glossy effect will be gone. Not to worry because Versamark makes a dual tip pen which allows me to go back and redo the areas that aren’t glossy anymore. This pen is also a lifesaver if there are small parts of your image that didn’t get stamped onto the cardstock very well.

Next, I stamped my sentiments. On three of the sentiments, shown below, I used Memento Dew Drops Dye Ink Pads.

However, for two of the cards, I didn’t have an ink color that matched very well so I used my Tombow ABT Dual Tip Markers to apply color to the stamp before stamping the image onto paper. I never knew that you could use Tombow markers to stamp images and I’m SO happy to have found this workaround!

Next, I used rectangle and oval dies along with my Vintaj Big Kick to cut out the sentiments.


Assemble the Cards

Now that all of my card parts are finished, it’s time to assemble the cards into their final versions. I used a corner cutter/rounder to cut opposite corners of the card itself, the cardstock as well as a couple of the sentiments. Next, I used craft glue to glue the sentiments to the colored cardstock.

Once that was done, I glued each piece of cardstock onto a blank card. That’s it, you’ve just created your own set of handmade greeting cards! Below are some group and individual pictures of the finished cards.


Conclusion

Well, there you have it! Hopefully I’ve helped you out by giving you some useful handmade card ideas. And if you followed along and did the project, now you have a set of cards that you can use for yourself or gift to someone else! Let me know in the comments down below if you have any questions or thoughts. Thanks very much for spending some time with me!

 
Supplies Used

Neenah Classic Crest Cardstock – Solar White, 110 pound weight

Papertrey Ink Cardstock – Aqua Mist, Green Parakeet, Ocean Tide, Plum Pudding, Sweet Blush

Fiskars SureCut Portable Paper Trimmer, 12 Inch Cut

Hero Arts S5033 DesignBlock Silhouette

Hampton Art Studio G “Happy Anniversary” Stamp

Kwan Crafts Words Clear Stamps for Card Making – “congratulations,” “happy birthday” and “with sympathy”

Stampendous “Mr. & Mrs.” Stamp

Bira Craft A5 Stampingpro Stamp Platform

Anti-Static Pouch

Tsukineko Versamark Ink Pad

Tsukineko Versamark Ink Pen

Recollections Stamp Cleaner

The Paper Studio Embossing Heat Tool

Stewart Superior Corp (Papertrey Ink) Clear Filigree Fine Embossing Powder 

Tsukineko Memento Dew Drop Dye Ink Pads – 704 New Sprout, 701 Cottage Ivy, 506 Sweet Plum

Tombow ABT Dual Tip Markers – 346 Sea Green, 743 Hot Pink, 993 Chrome Orange

Vintaj Big Kick Die Cutting Machine

Post It Notes (for keeping paper in place when die cutting sentiments with the Big Kick)

Hero Arts Infinity Nesting Rectangles

Nellie’s Choice Multi Frame Dies, Straight Oval

Elmer’s Craft Bond 2 Way Dual Tip Glue Pen

Sun Star Kadomaru Pro Corner Cutter

Welcome, thanks for visiting! I hope you find some helpful information here. I wish you well on your creative journey!


MY STORY

My name is Dawn and I am a crafter. My first crafting projects were greeting cards that I made for family and friends after I swore that I would never again pay $5 for a thin, terribly made card! Since then, my love for crafting has only grown. Some crafts that I enjoy are hand lettering and faux calligraphy, paper crafting and making jewelry. But my heart belongs to making greeting cards. I have developed interests in other kinds of crafts, but I always seem to come back to greeting cards. I love creating something that, when given to someone, makes them feel acknowledged, happy or just not so alone.

The style of greeting cards that I make is on the simpler, less busy side. What my style does have is lots of vibrant color. The color can be in the form of ink from a stamp pad, card stock, markers/pens, glitter glue and embossing powders.


WHY I LOVE HELPING PEOPLE

One of the few things that I love more than making greeting cards is helping people. I think it’s because I have made some sort of connection with that person. In my former life I helped people as an Administrative Assistant and as a Social Worker. Connecting with people by sharing my greeting card ideas is another way that I hope to help anyone who visits the site.


THE GOAL OF MY SITE

I have learned countless techniques by watching people on YouTube and I hope that this website can help me to pay it forward in terms of providing information and inspiration for your next creative project. Even though I use these techniques to make greeting cards, many of them could be used in a variety of other creative ways around your house, at work and potentially in other areas of your life.


If you ever have questions or comments, feel free to post them below and I will do my best to help you out.

All the best,

Dawn
www.handmadegreetingcardideas.com
dawn@handmadegreetingcardideas.com