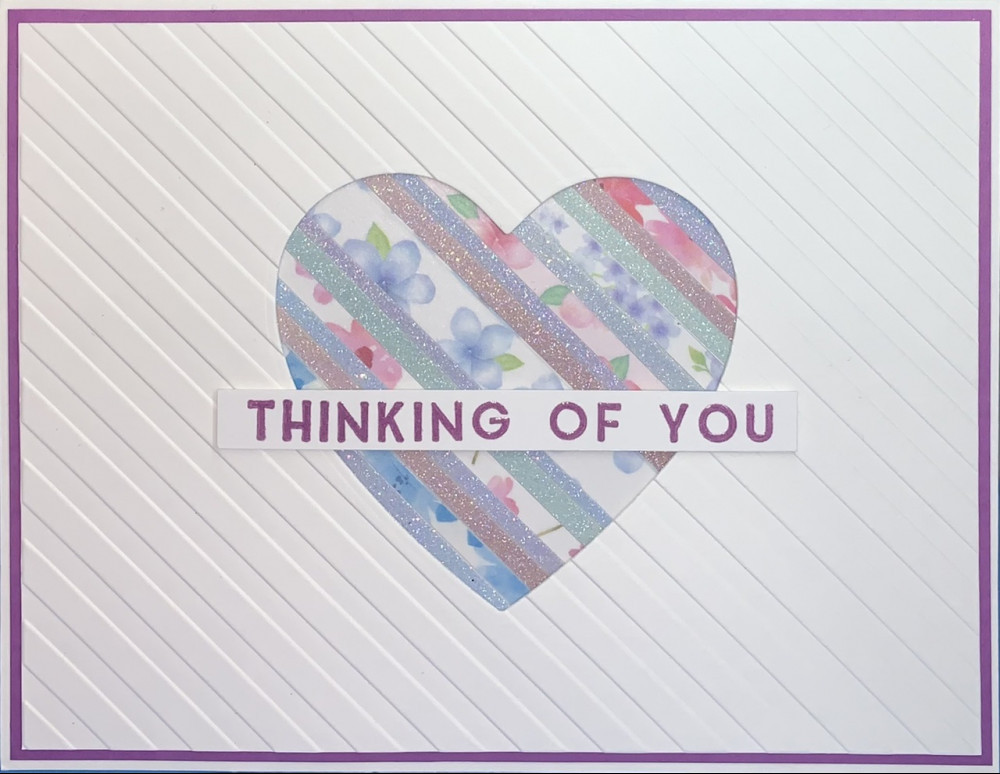
Hi there! Today I’m bringing you two embossing folder card ideas. I’ll call the first one the Diagonal Stripes Card, which is shown in the picture above.
I’ll call the second one the Wood Grain Flower Card:

Please join me as I show you how I made these two cards!
Diagonal Stripes Card
For this card, I first started with some white cardstock and various rolls of washi tape that I had in my stash. I laid out each strip onto the cardstock just below the previous strip so that no cardstock was showing in between strips.
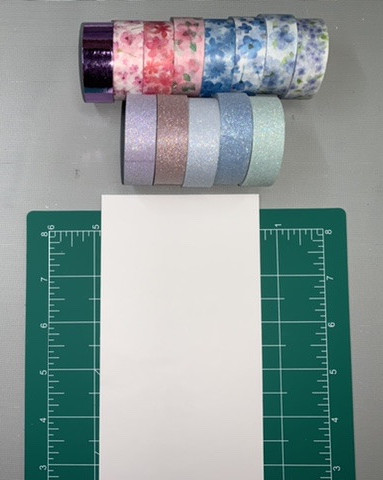
Below is a picture of how the cardstock looked when I was finished applying the washi tape:
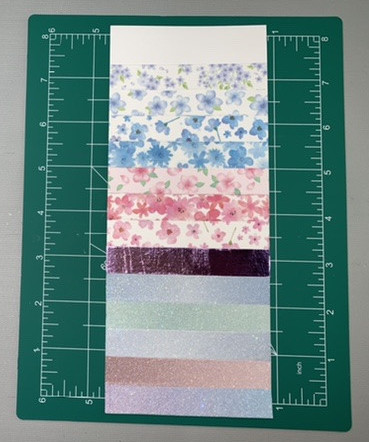
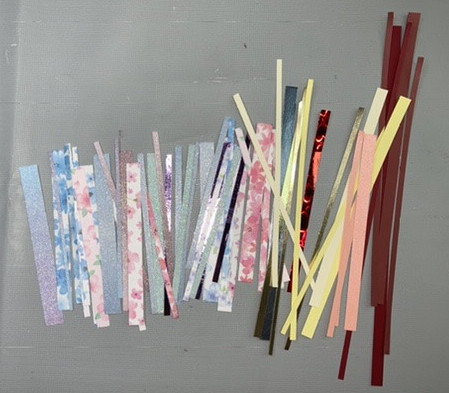
My next step was to cut the washi tape cardstock piece into strips of various sizes with my paper trimmer. No need to be precise about the width of each piece as long as you have a couple of different widths for each style of washi tape. Using a paper trimmer would be the quickest and most precise way to do this. I also added in a few colors from my cardstock stash in case I wanted more color variety on my final card. This is how the pieces looked after trimming:
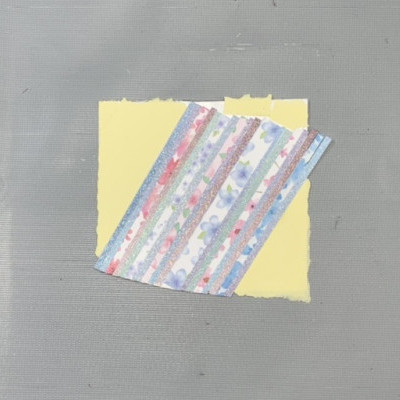
The next thing I did was to adhere the strips to one side of a double-sided adhesive sheet. I used an adhesive sheet instead of glue because I thought it would be a cleaner application and I wouldn’t have to worry about gluing the back of every piece, which could be very time consuming and could result in glue trying to squeeze in between each strip. I knew I was going to have these strips peeking out from a heart-shaped die cut window on the front of my card, so I knew I had attached enough strips once the strips filled the entire shape of the heart die. Here is how the strips looked once they were attached to the adhesive sheet:
Once that was finished, it was time to make the card front with the heart-shaped window. As shown in the picture below, I placed the heart-shaped die on a piece of white cardstock and ran it through my die cutting machine. When using a die cutting machine to cut shapes out of paper, crafters often refer to a “sandwich” of materials that they use to ensure a clean cut when inside of the die cutting machine. The sandwich that I use for most of my dies is (from bottom of the sandwich to the top) is Sizzix Multi-Purpose Platform with both tabs closed, metal shim adapter (this helps both simple and intricate dies to cut the paper more cleanly), clear cutting plate, cardstock, die and another clear cutting plate as the top layer. I left the top cutting plate off in the picture below because both of my cutting plates have so many cut lines on them that you wouldn’t be able to see though them 🙂

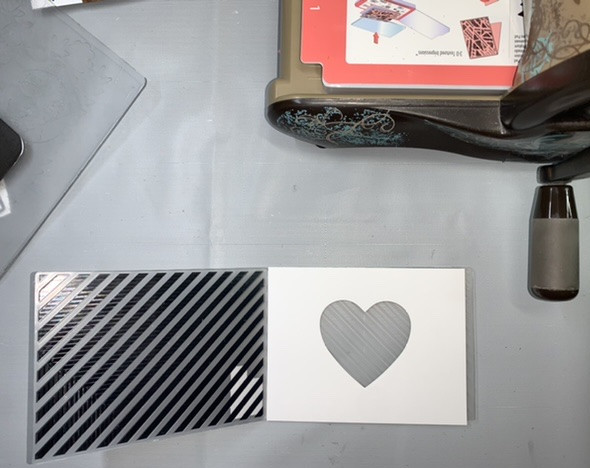
After cutting the heart shape out of the cardstock piece, I placed the cardstock piece with the heart-shaped hole in it inside of my embossing folder and ran it through my die cutting machine again, but this time the sandwich was: Sizzix Multi-Purpose Platform open to Tab 1, clear cutting plate, embossing folder with the cardstock piece inside and another clear cutting plate on top. The picture below shows that cardstock piece inside the embossing folder before I close it and the Multi-Purpose Platform open to Tab 1.
Once my cardstock piece has been embossed, I took my washi tape strips piece and placed it behind the heart window and moved it around until the strips were going the same direction as the diagonal lines on the cardstock piece as shown below. After I had it aligned, I taped the washi tape piece onto the back of the white, embossed cardstock piece, and the result is shown in the picture below. Once I was sure that I didn’t want to change anything around, I glued the washi tape piece onto the back of the cardstock piece with the heart-shaped window, and the result is shown below.
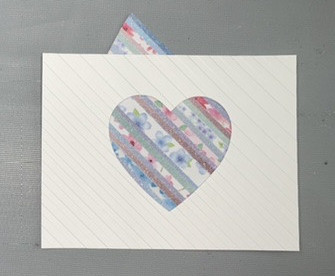
Next, I cut off the extra washi tape that extended beyond the top of the white cardstock. After that, it was time to stamp the “Thinking of You” sentiment onto some white cardstock. Because the washi tape rolls were a new purchase, I wasn’t quite sure which of my stamp pad colors would match the best, so I tried a few different colors. The picture below shows the sentiment stamped with my Bira stamping platform and Distress Oxide Dusty Concord ink. Remember to always rub an anti-static tool onto whatever paper you will be using. Doing this eliminates any static electricity present that might make your stamped image turn out less clear.
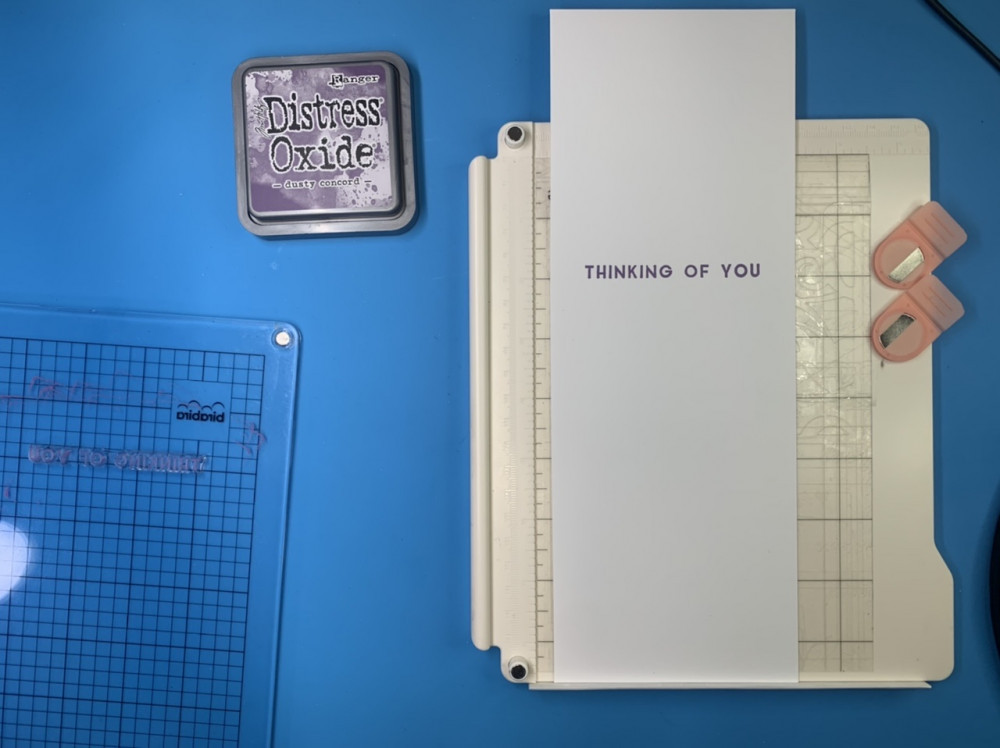
The Dusty Concord didn’t match the washi tape very well, so I tried a few other colors before settling on my ColorBox Elderberry stamp pad. Each time that I stamped the sentiment, I immediately covered the stamp with clear embossing powder and heat set it with my heat tool which gives the stamped image a nice, glossy finish. This adds a bit more interest to the card.

Putting The Card Together/Finishing Touches
After I stamped the sentiment in the correct color, I cut it out and cut two other blank strips of the same size to glue to the back of the sentiment. That way, when I glue it into the card, it will have a bit of height that will add dimension to the card. The picture below shows the remaining elements of the card that need to be put together.
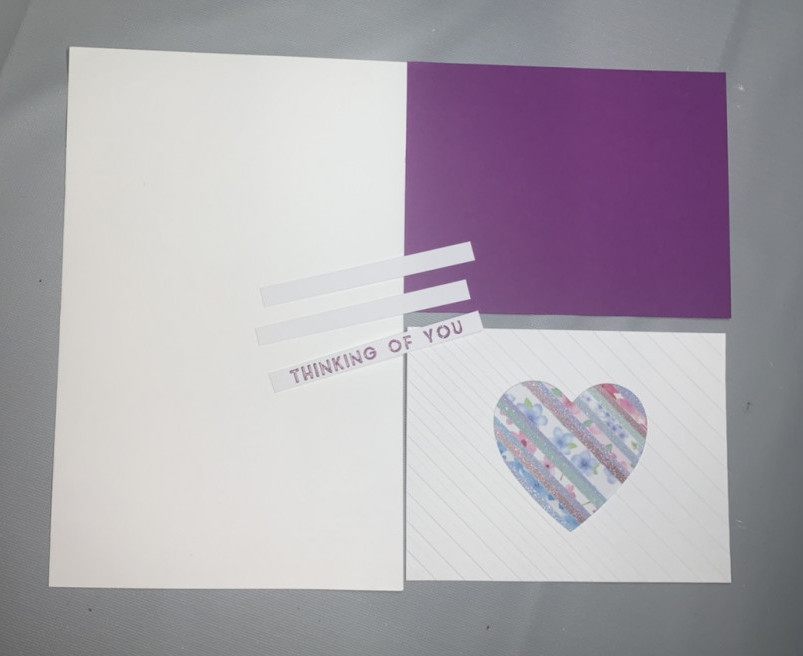
Next, I used my scoring board/bone folder to make the top fold of the card. I glued the card front to a colored piece of cardstock that matched both the washi tape and the sentiment ink color. This helps to break up all of the white on the card front and gives the card a bit more interest. Then I glued the “THINKING OF YOU” sentiment to the card front a bit below the middle of the card. Finally, I glued the card front to the folder card base.
That’s it for how I made the Diagonal Stripes Card! Here is another look at the final product:
Wood Grain Flower Card
I made this card for my Mom for Mother’s Day, and I think she really liked it. That made me happy since she always makes me so happy!
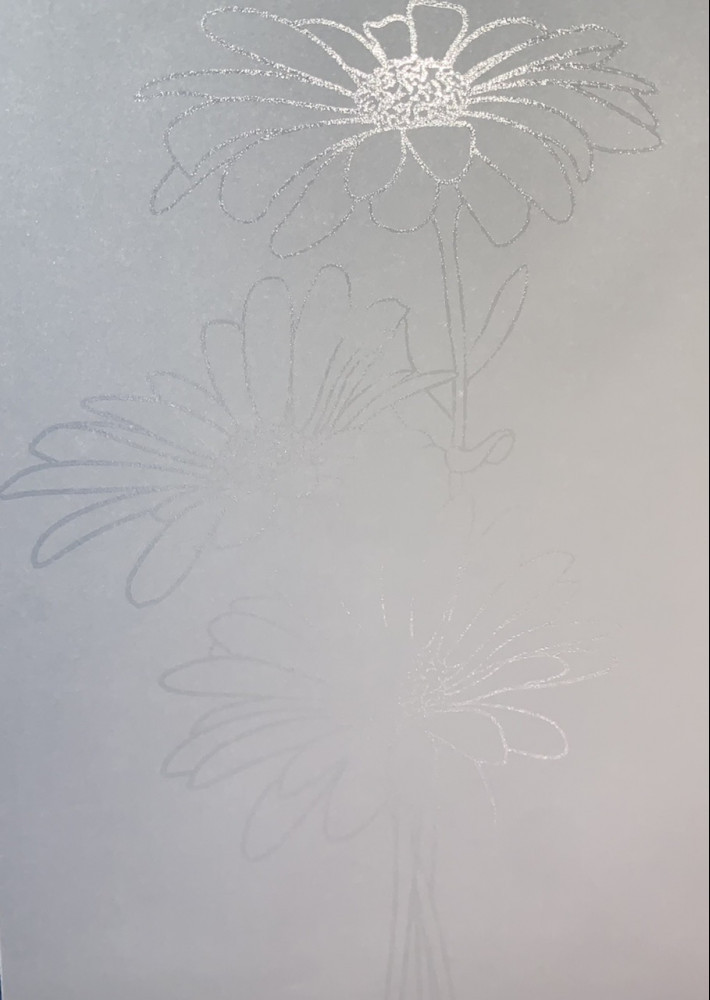
When trying to decide what kind of card I wanted to make, I had two requirements: first, the card had to incorporate my Mom’s favorite color, which is a teal/aqua color; and second, I wanted to use my alcohol markers on vellum in some way. So I decided to stamp and die cut a flower using vellum, which is a semi-sheer, semi-opaque kind of paper. The first thing that I did was to rub the vellum with an anti-static pouch, which eliminates any static electricity that could make your stamped image not as clear. Below is a picture of the image stamped onto the vellum using embossing/watermark ink, which is a clear, sticky ink.
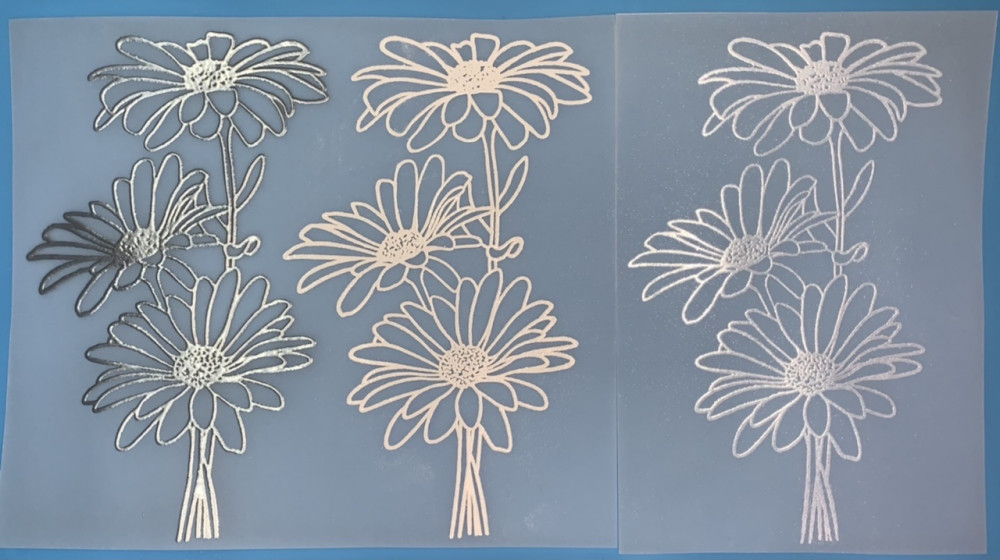
After I stamped the image with the embossing ink, I immediately covered the image with silver embossing powder, tapped off the excess, then heated it with my heat tool to melt the powder onto the ink. The picture below shows the same flower image stamped three different times, each one covered with a different color of embossing powder. The first flower is heat embossed with silver embossing powder, the second with white embossing powder and the third with a pearlescent embossing powder.
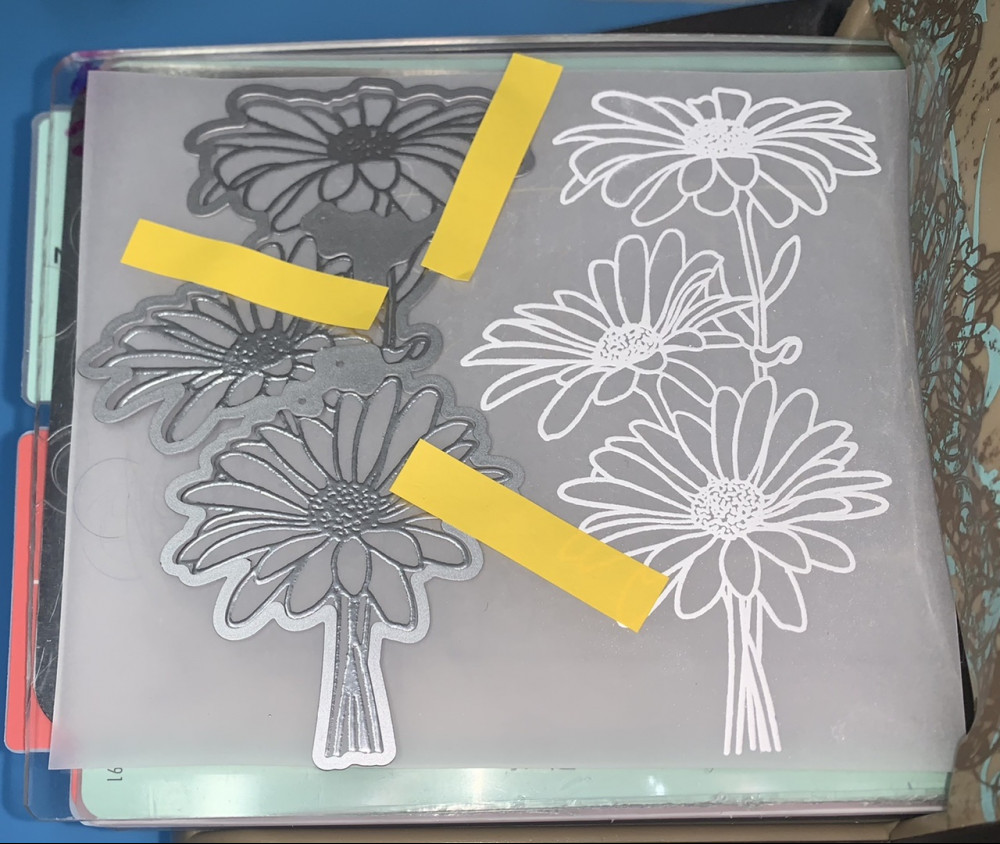
Once I was done heat embossing the stamped flower image, it was time to cut it out using the coordinating die and my die cutting and embossing machine. Below is a picture of the flower die taped to the vellum so that it doesn’t shift while it’s going through my die cutting and embossing machine (you may want to do some sample stamping and die cutting before starting your project). If you’re having trouble getting a clean die cut, I suggest you add a piece or two of cardstock shims to your cutting “sandwich.” You could also try placing your die with the cutting side face up (cutting side facing the ceiling) in the sandwich or you can buy a metal cutting adapter/shim.
Below is a picture of the vellum flower once it has been die cut.
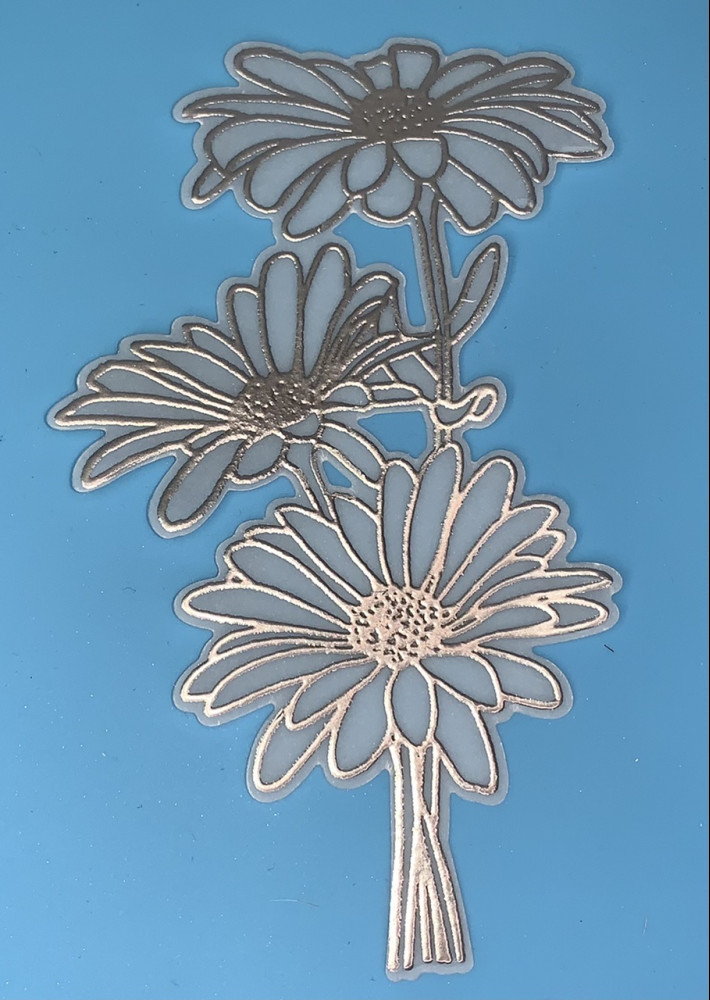
Next it was time to color the vellum flower. You can color on the front of the stamped image or on the back. I find coloring on the back to be more forgiving in that if you go over the lines a bit, it’s much more noticeable on the front. Also, I like the more subtle color that happens when you color the back of the image. Below is a picture of a vellum flower with the top colored in on the front and the bottom colored in on the back so that you can see the difference. Coloring on the front also results in more streaky lines.

When I made this Mother’s Day card for my Mom, I didn’t have time to take pictures of each step, so here’s a picture of another vellum die cut flower that I colored in on the back:
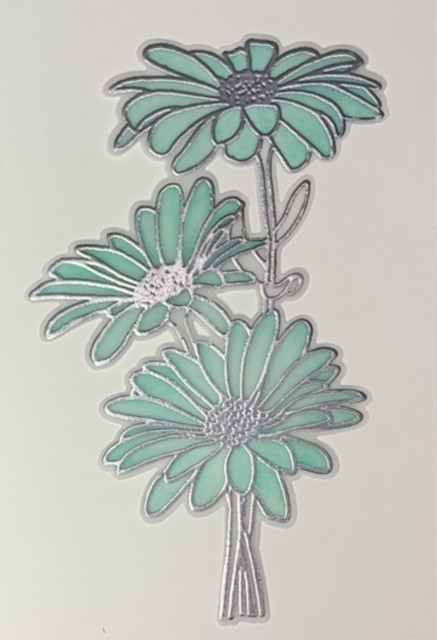
I used Spectrum Noir’s Triblend marker in Green-Turquoise because it’s 3 markers in different shades (Light, Medium and Dark) of the same color. I used all three shades but, due to my inexperience with alcohol marker blending, it’s hard to see the different shades in the final product. You live and learn, am I right??
Next, it was time to make the background piece for the card. Once I found the colors I wanted to use, I used my blending brush to apply the colors to the cardstock. Below is a picture of the cardstock once I finished applying the ink:
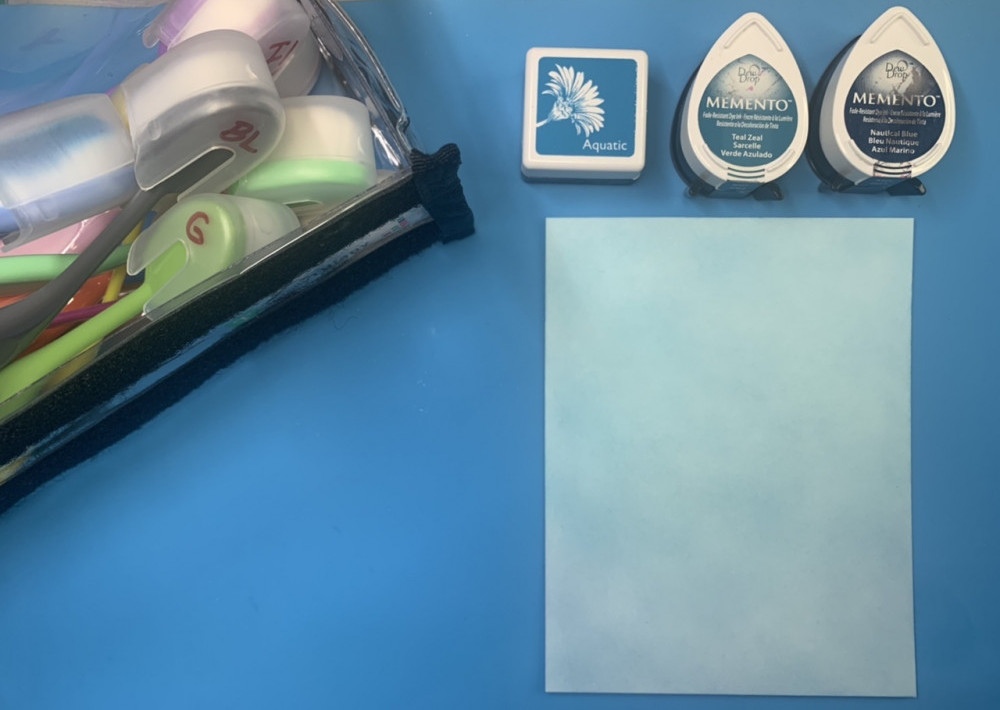
At this point it was time to add some texture to the inked piece of cardstock, so I put it into an embossing folder and ran it through my die cutting/embossing machine.
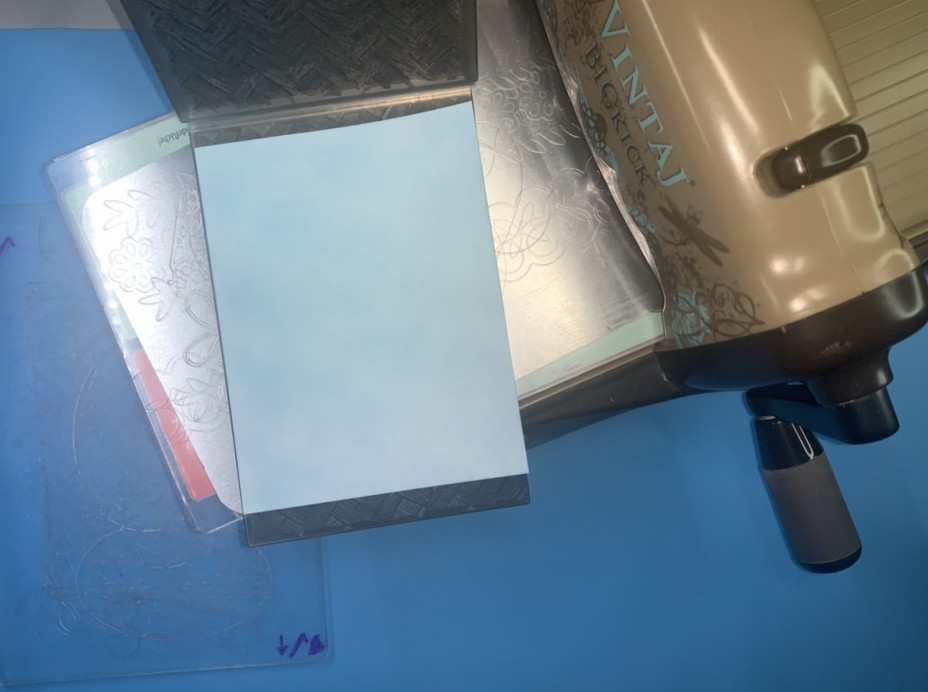
I had recently purchased two embossing folders and wanted to try them both out, so I inked up another cardstock piece in the same colors and embossed it with the other embossing folder. Below is a picture of a white and two colored pieces of cardstock embossed with the two embossing folders:
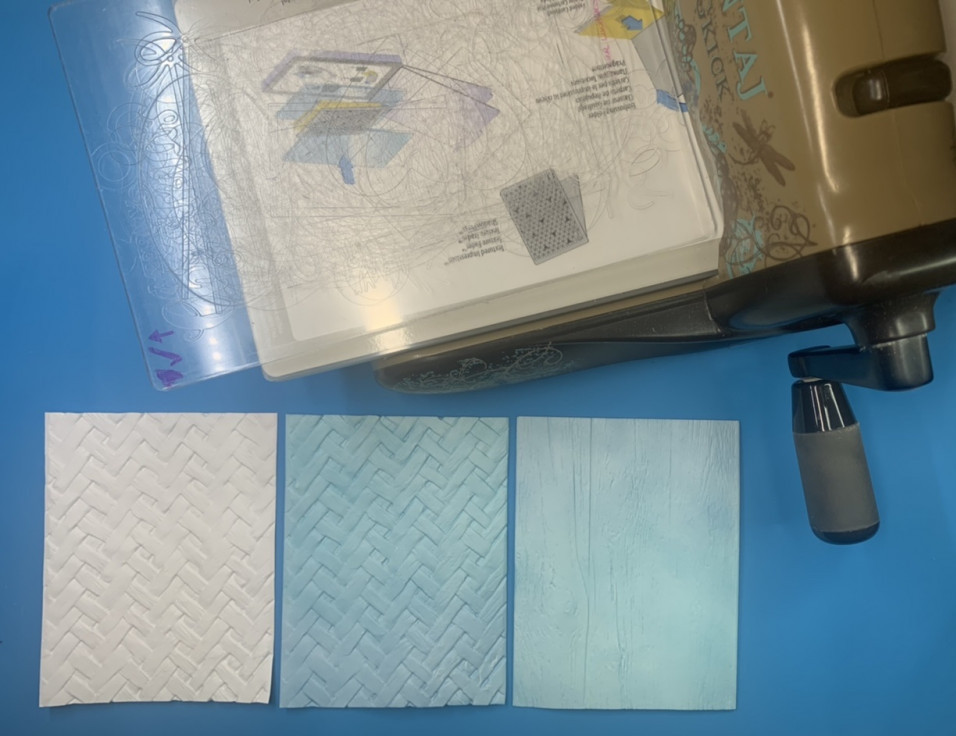
I really liked the textures that both of the embossing folders produced, but I ultimately decided to use the wood grain- textured background (the one on the right).
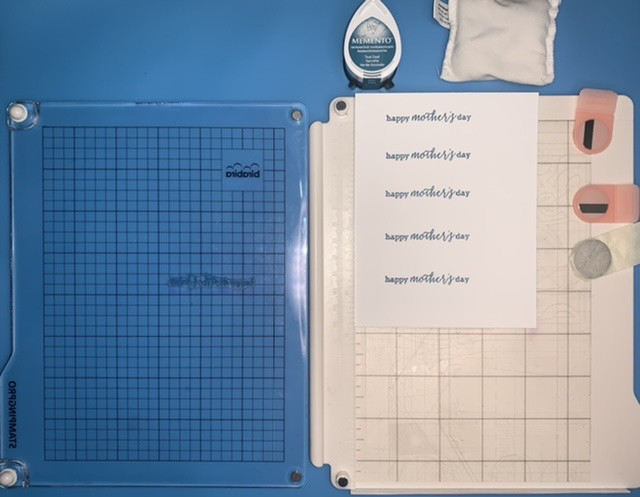
After I finished the background, it was time to stamp my “happy mother’s day“ sentiment with Memento’s Teal Zeal Dye Ink, which matched both the background and the marker that I used to color the vellum flower. I rubbed my anti-static bag onto my cardstock before doing any stamping. This reduces the static electricity and increases your chances of stamping a clearer, crisper image. When I stamp sentiments, I usually stamp more than one so that I have extras for later. I positioned my stamp at the top of my cardstock piece, closed the stamping platform to affix the stamp to the stamping platform cover, inked my stamp then stamped the image. Each time I stamp, I raise the cardstock piece a small amount so that it is in the correct position for another stamp. In a short time, you’ll have many extras for other projects! The picture below shows me stamping multiple sentiments at the same time.
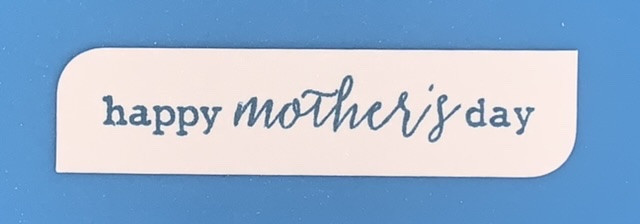
After I stamped the sentiment, I cut it off of the larger cardstock piece with my paper trimmer. Then I used my corner rounder to round the corners of the top left and bottom right corners. Below is a picture of the sentiment after it has been stamped, cut to size and has had two of its corners rounded.
Putting The Card Together/Finishing Touches
After finishing the individual card elements, it was time to assemble the final card. I used my paper trimmer, scoring board and bone folder to make a top-folding card base.
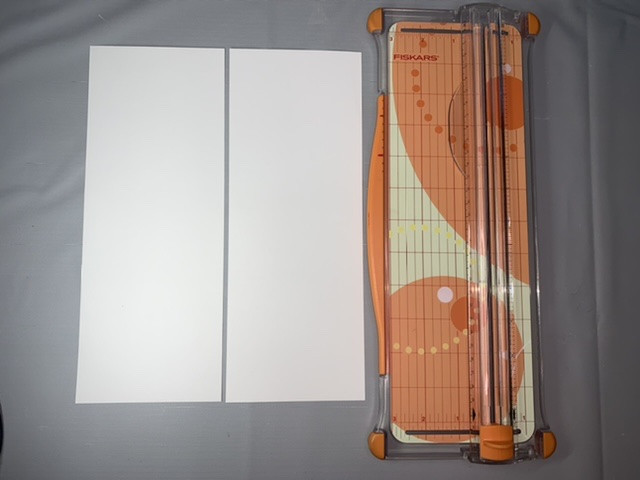
I cut a Letter-sized (8.5″ x 11″) piece of cardstock in half lengthwise which gave me two pieces that were 4.25″ x 11″, as shown below.
Then I used my scoring board/bone folder to make the top fold of the card. The pictures below show me scoring the cardstock then using the bone folder to make a sharp crease.
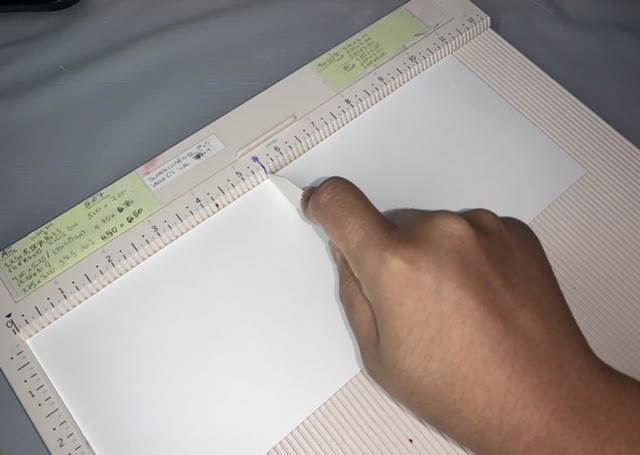
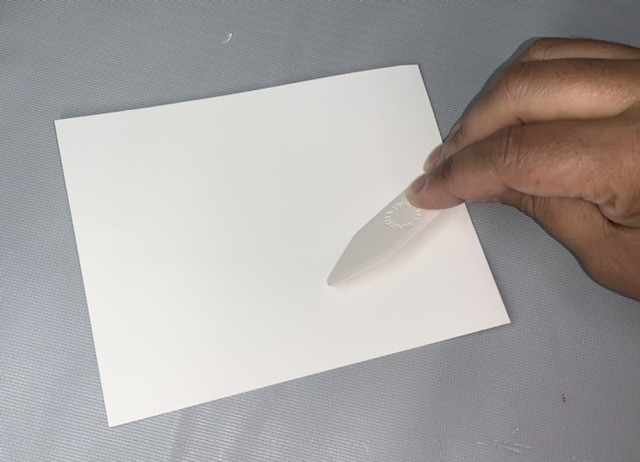
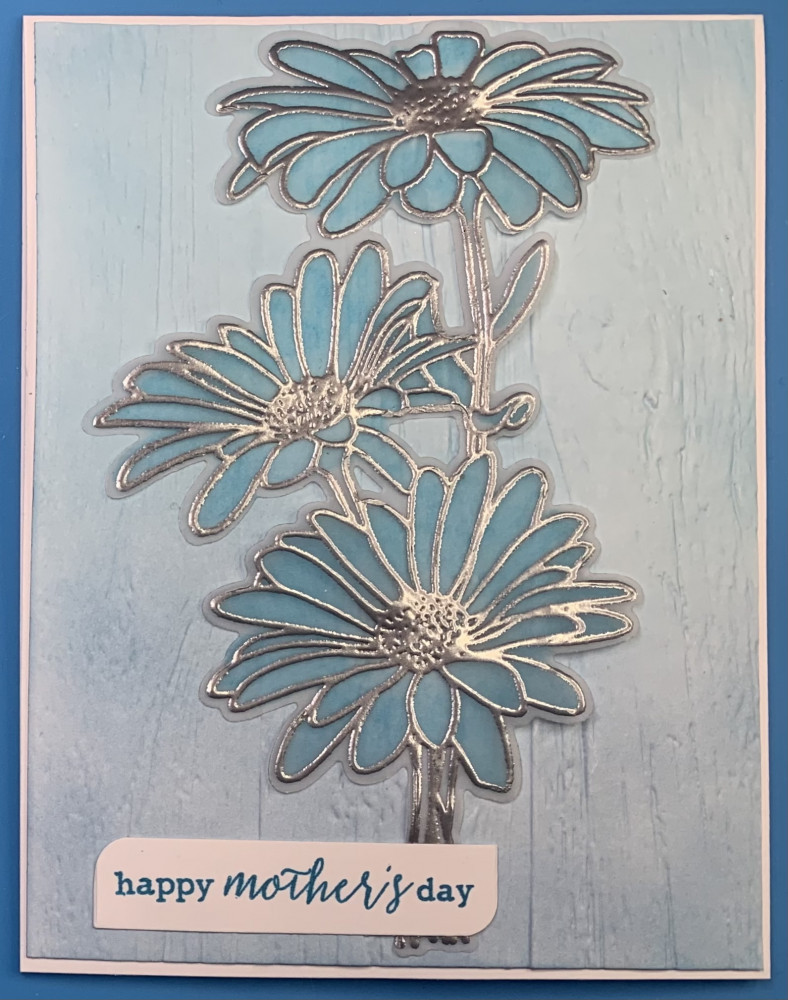
Next, I glued the vellum flower onto the teal wood grain background piece and I glued the sentiment at the base of the flower a bit to the left of center. Finally, I glued the background piece onto the white card base, and there you have it-the card is finished!
Here’s another picture of the finished card:
Conclusion
That’s it for today! I had a great time showing you my two embossing folder card ideas, and I hope you did too! Enjoy your day.
Supplies Used
Neenah Classic Crest Cardstock – Solar White, 110 pound weight
Recollections Purple Passion Paper Pack (5th in the pack)
Kwan Crafts Words Clear Stamps for Card Making – “happy mother’s day“
Bira Craft A5 Stampingpro Stamp Platform
Anti-Static Bag by Recollections™
Recollections Stamp Cleaner
The Paper Studio Embossing Heat Tool
Tombow Mono Multi Liquid Glue, 0.88 Ounce
Martha Stewart Crafts Scoring Board Tool for Making Cards, Envelopes, Giftboxes and More, Off-White, 12″ x 12″
Sizzix Vintaj Big Kick Die Cutting/Embossing Machine
Sizzix BIGkick/Big Shot Multi-Purpose Platform
CottageCutz CCSHIM1 Universal Shim Plate Die Cuts
Hero Arts DI198 Infinity Dies, Nesting Rectangle
Rainbow Clear Stamp & Die Set by Recollections™
Park Lane A2 Embossing Folder “Stripe”
Tim Holtz By Sizzix Lumber Texture Fades Embossing Folder
Tonic Studios Tim Holtz Comfort Trimmer 8.5″
Colorbox Archival Pigment Stamp Pad Boysenberry (I purchased this a long time ago. It is now called Archival Pigment Ink Pad by Recollections™)
Momenta Star & Heart Layered Dies (Hobby Lobby)
Post-it Super Sticky Full Stick Notes, 2×2 in, 8 Pads, 2x the Sticking Power, Rio de Janeiro Collection, Bright Colors (Orange, Pink, Blue, Green) (for keeping paper in place when die cutting with the Big Kick)
Hero Arts AF389 Bold Ink Cubes, 4-Piece, Tropical Waters (Summer Sky, Aquatic, Indigo and Deep Ocean)
Stewart Superior Corp (Papertrey Ink) Clear Filigree Fine Embossing Powder
Tsukineko Memento Dew Drops Fade Resistant 4-Pack Dye Inkpads Assortment, Dolphin Play (Elderberry, Teal Zeal, Nautical Blue, Gray Flannel)
Daiso Masking tape, Z, 4 pcs, 0.6 in x 3.3 yd, 10pk (Daiso’s website only sells a fraction of what they sell in their stores, and the website requires you to buy items in sets of 10. Of all of the Washi tape that I used for this card, I could only find one set online.)
Personal Stamp Exchange Embossing Powder – Silver
(I don’t think this is being sold brand new in stores anymore. If you want this exact brand, you’ll need to buy it on eBay, Mercari, etc. Any silver embossing powder should give you similar results.
Clear 8.5″ x 11″ Vellum Paper by Recollections™, 40 Sheets
Spectrum Noir Blend Triblend Blendable Alcohol Marker 3 Colours in 1 Pen-Green Turquoise
Yoseng 10 Colored Ink Blending Brushes for Card Making, Craft Broad Application Assortment Paper Crafter Color Code Handle with dust Cover (Rainbow 4)
